 NiView Docs
Solar Camera
Quick start guide and user manual for the Solar Camera (Ultra Low Power).
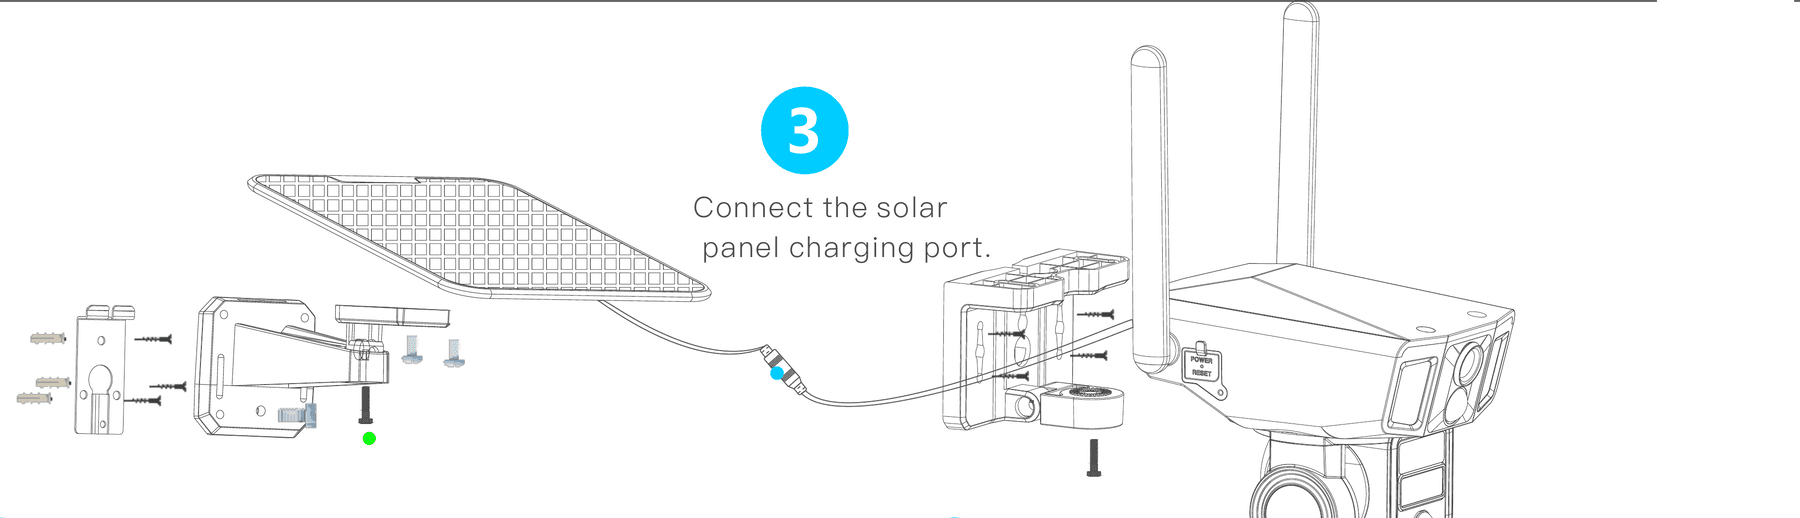
This guide walks you through everything from unboxing and Wi-Fi setup to the NIVIEW app, installation and troubleshooting. If you run into any issues, the FAQs cover the most common questions.
What's Included
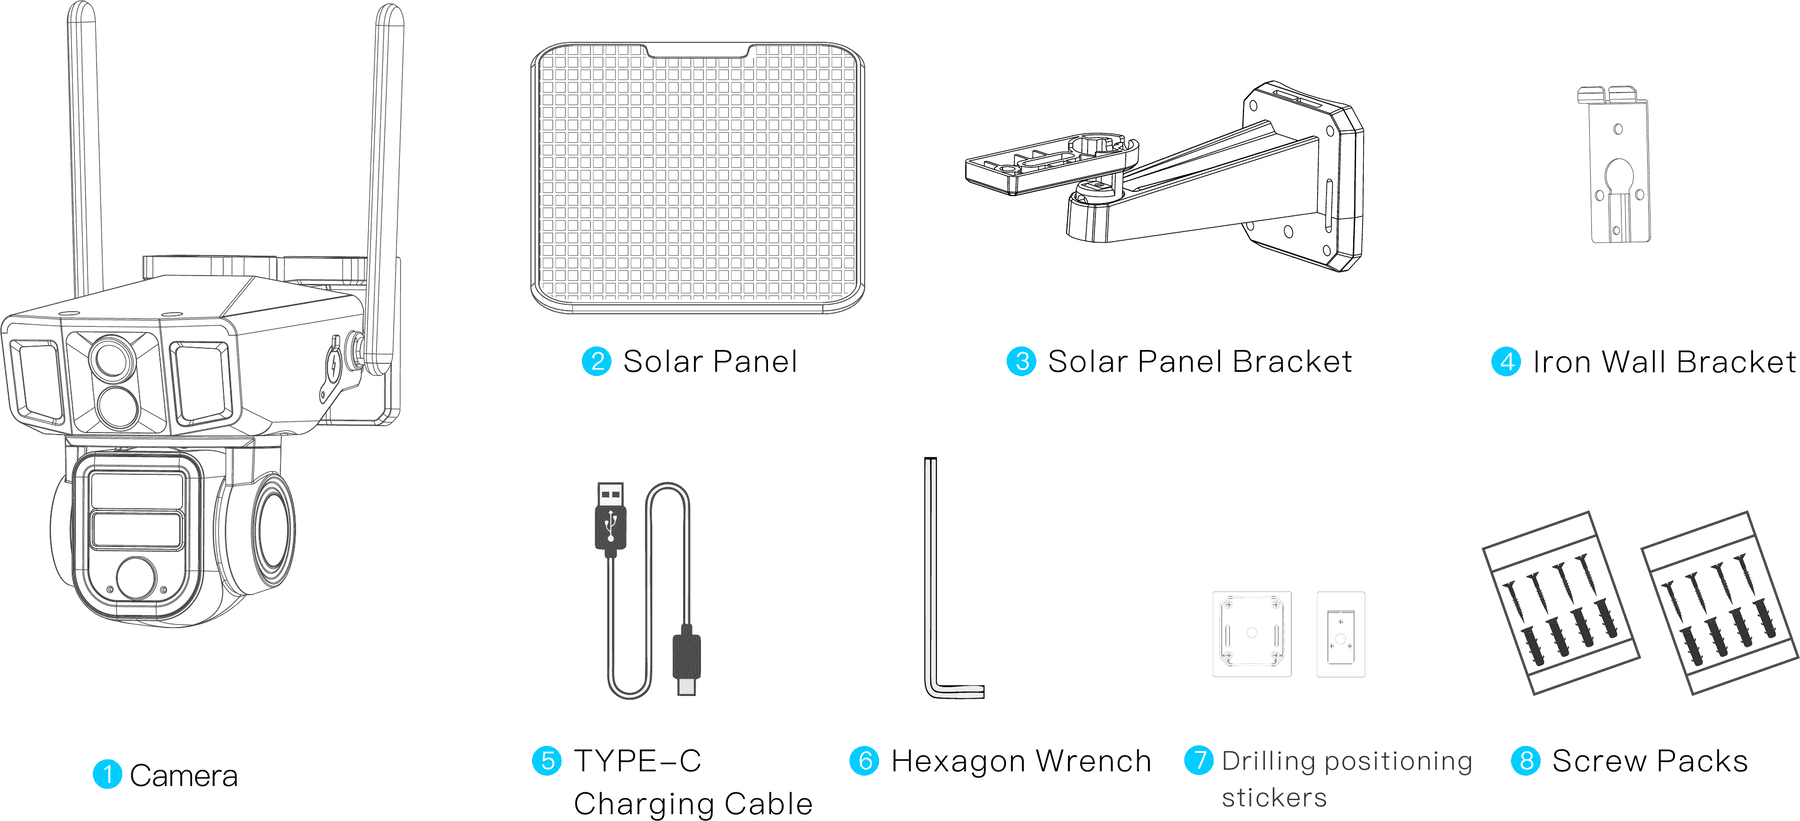
- Camera
- Solar Panel
- Solar Panel Bracket
- Iron Wall Bracket
- TYPE-C Charging Cable
- Hexagon Wrench
- Drilling positioning stickers
- Screw Packs
Product Overview
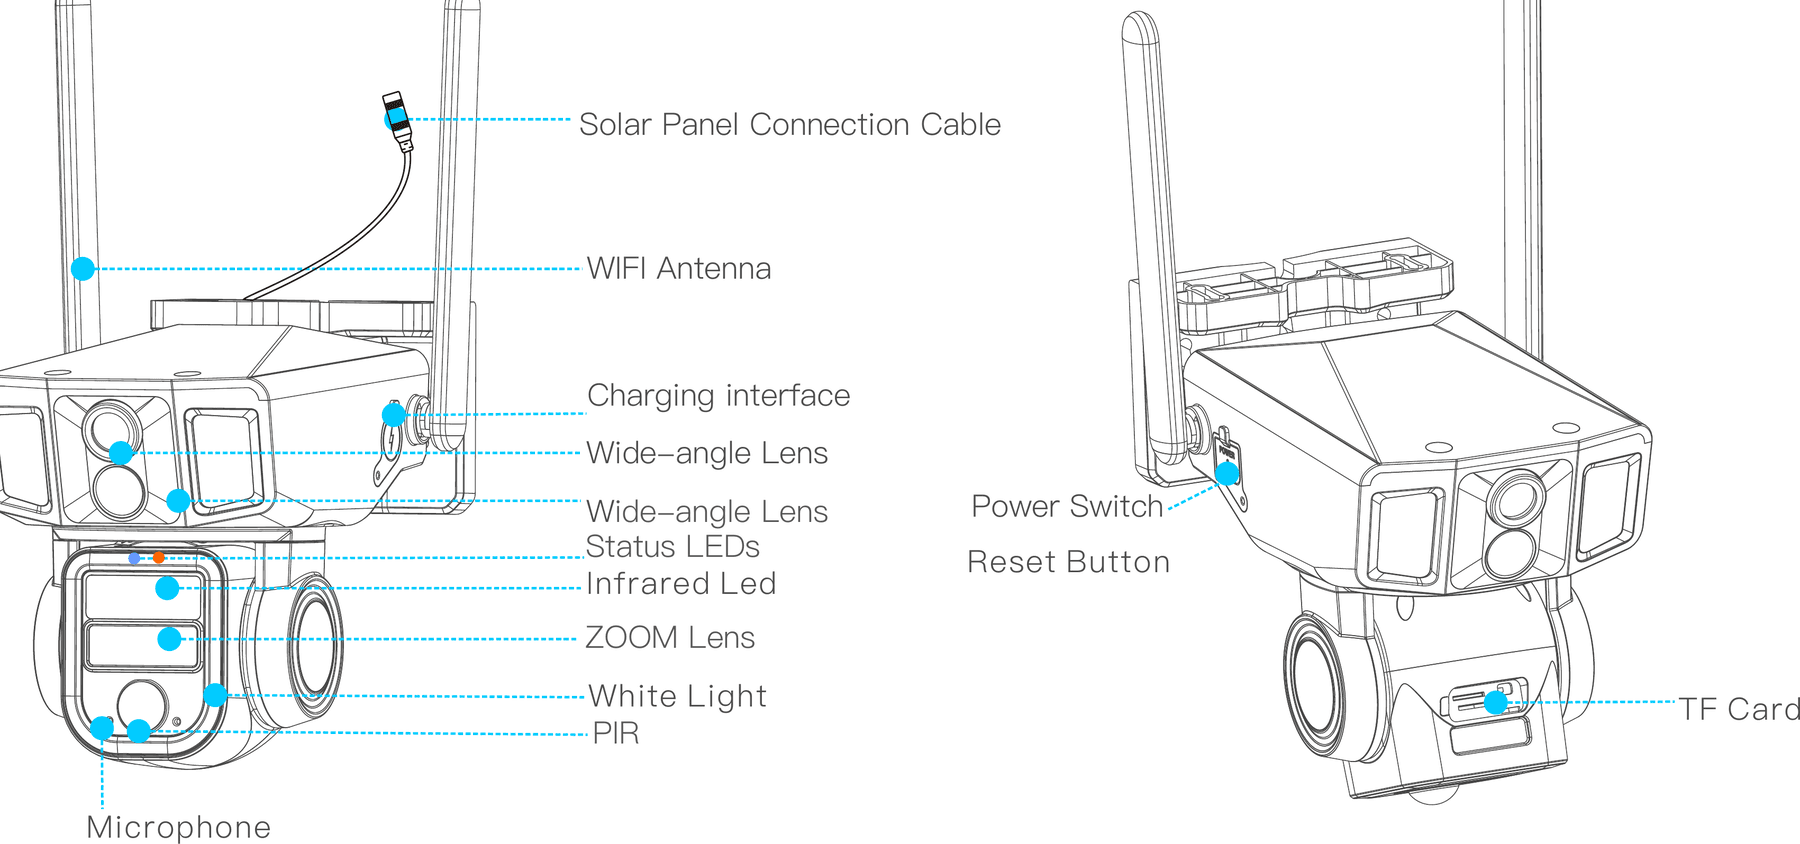
- Solar Panel Connection Cable
- WIFI Antenna
- Charging interface
- Wide-angle Lens
- Wide-angle Lens
- Status LEDs
- Infrared Led
- ZOOM Lens
- White Light
- PIR
- Microphone
- Power Switch
- Reset Button
- TF Card
Application Scenarios
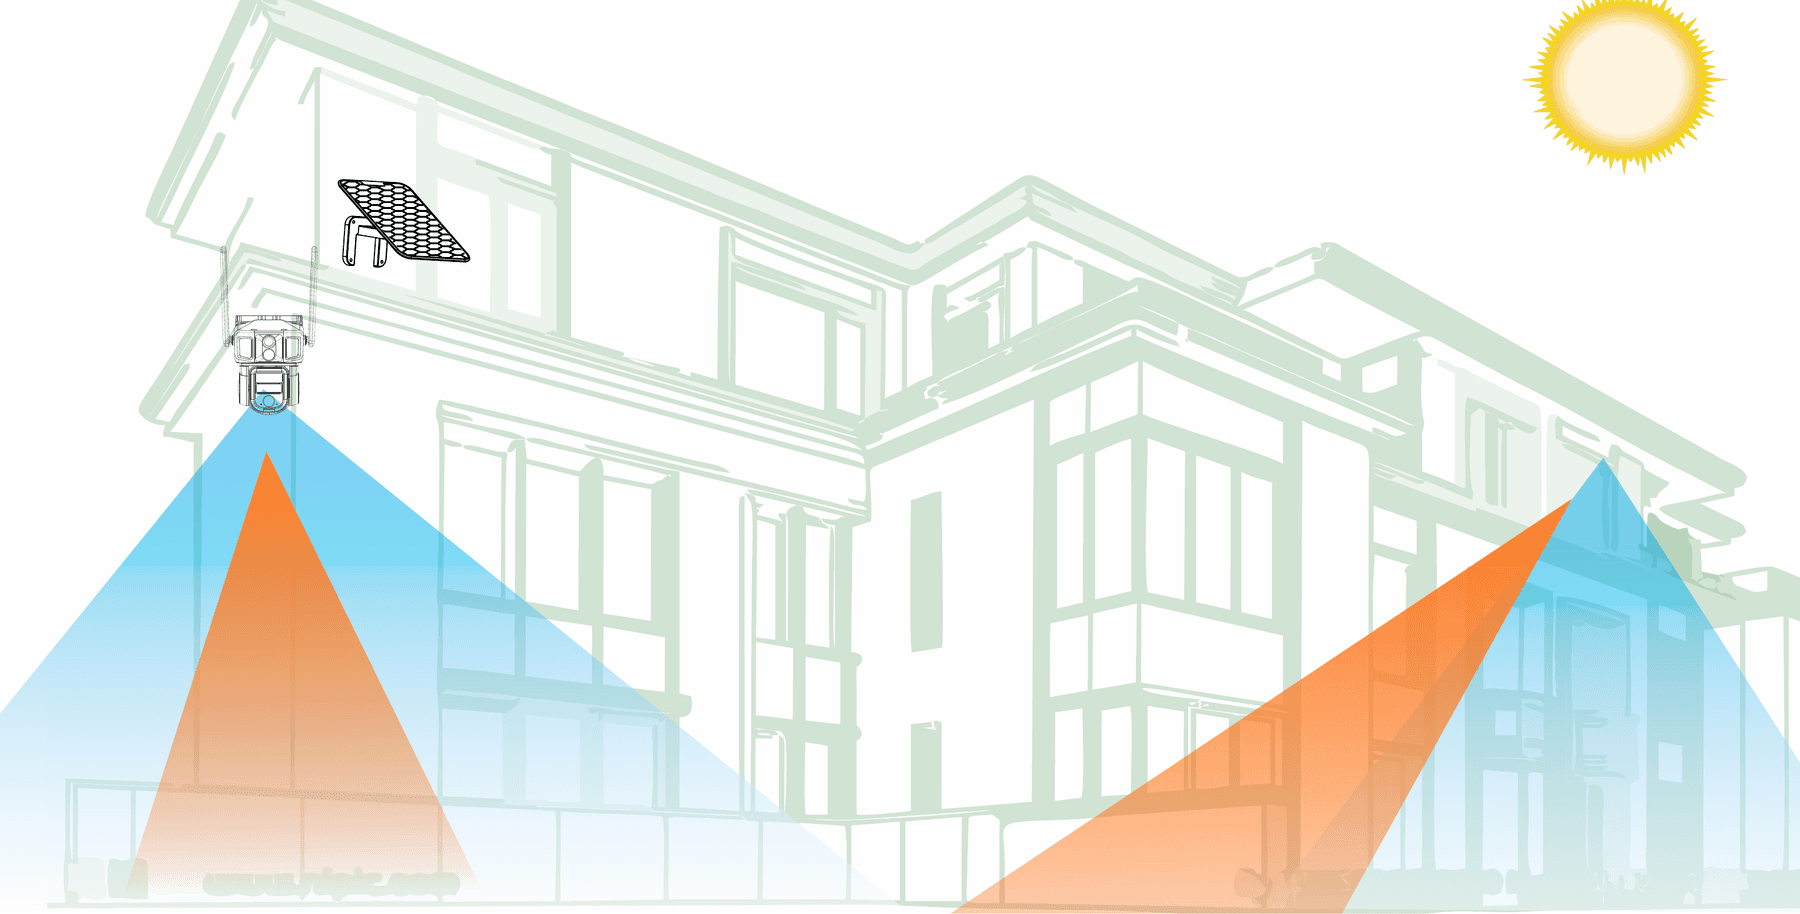
No power supply required, please move the solar panel toward the maximum sunlight orientation. Install the camera according to the environment, wide-angle lens for monitoring overall situation, PTZ lens for watching details. You can view and control the two displays at the same time that realize wiring-free, one machine in multi-degrees of no dead angle monitoring.
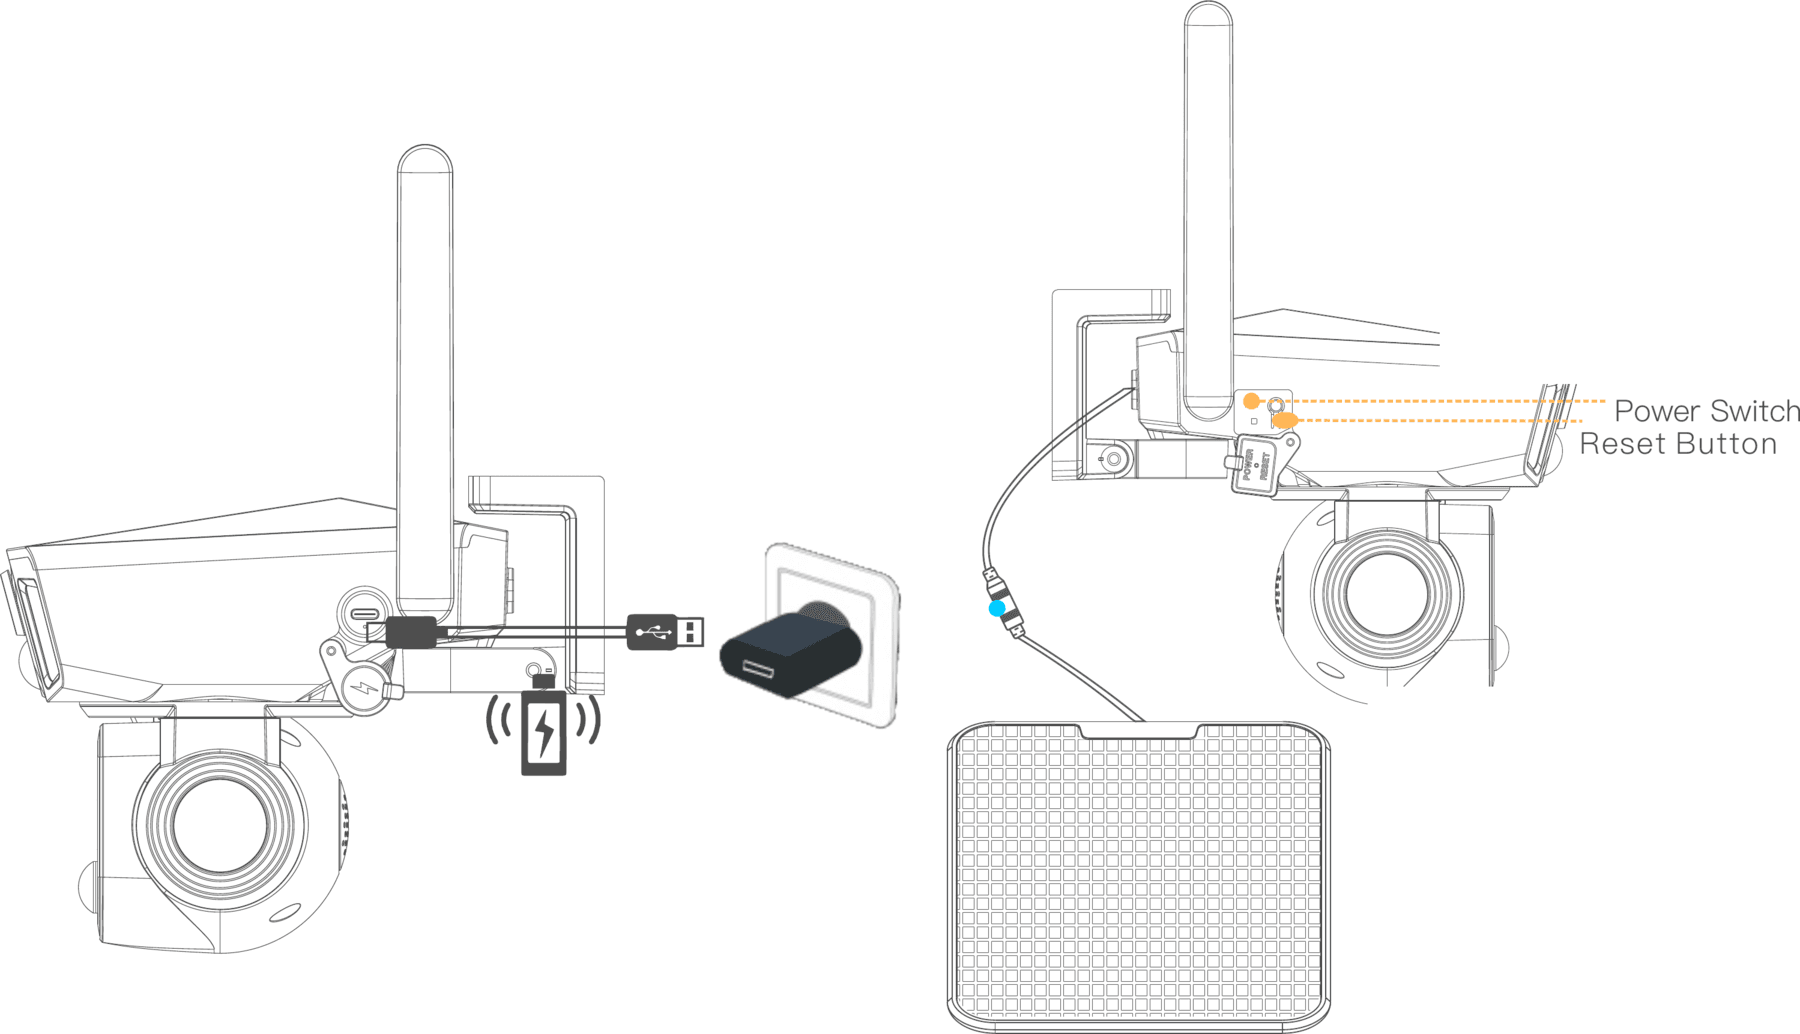
Boot Instructions
Download APP & Register
Download the App
Download the APP NIVIEW from App Store (IOS devices) or Google Play (Android device).
Scan the QR code or visit website to download the APP.
Website: APP.NICEVIEWER.COM
Register
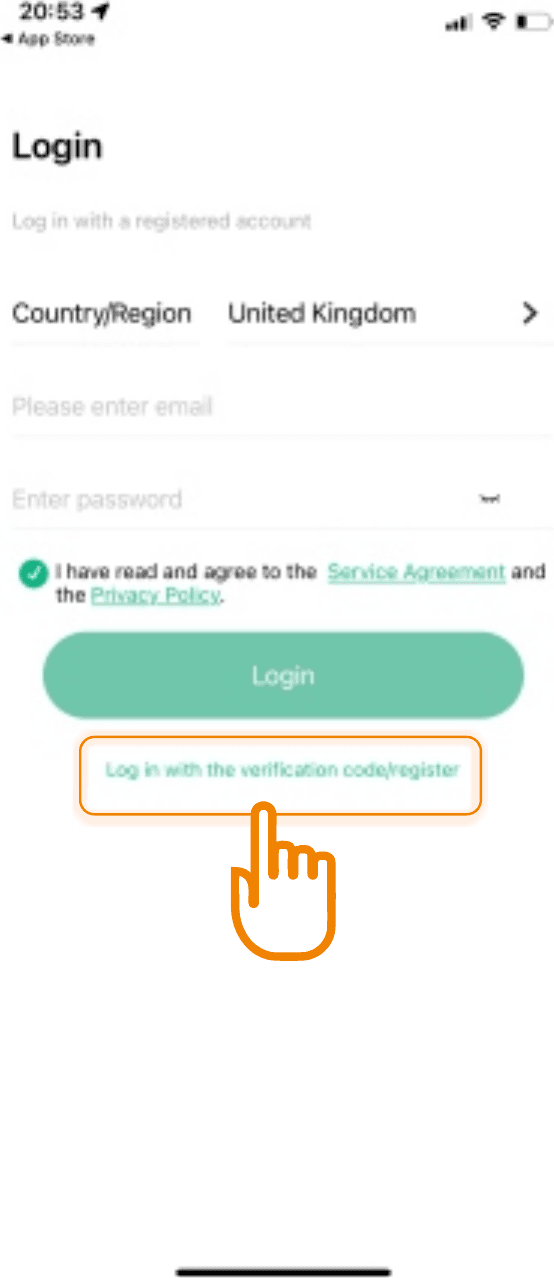
To better user experience and equipment protection, we suggest that first-time user choose verification code mode to register, use Email to register your account by APP and set the password for your confidentiality. Account and password to login.
Configuration and Addition of WiFi Devices
Add Camera
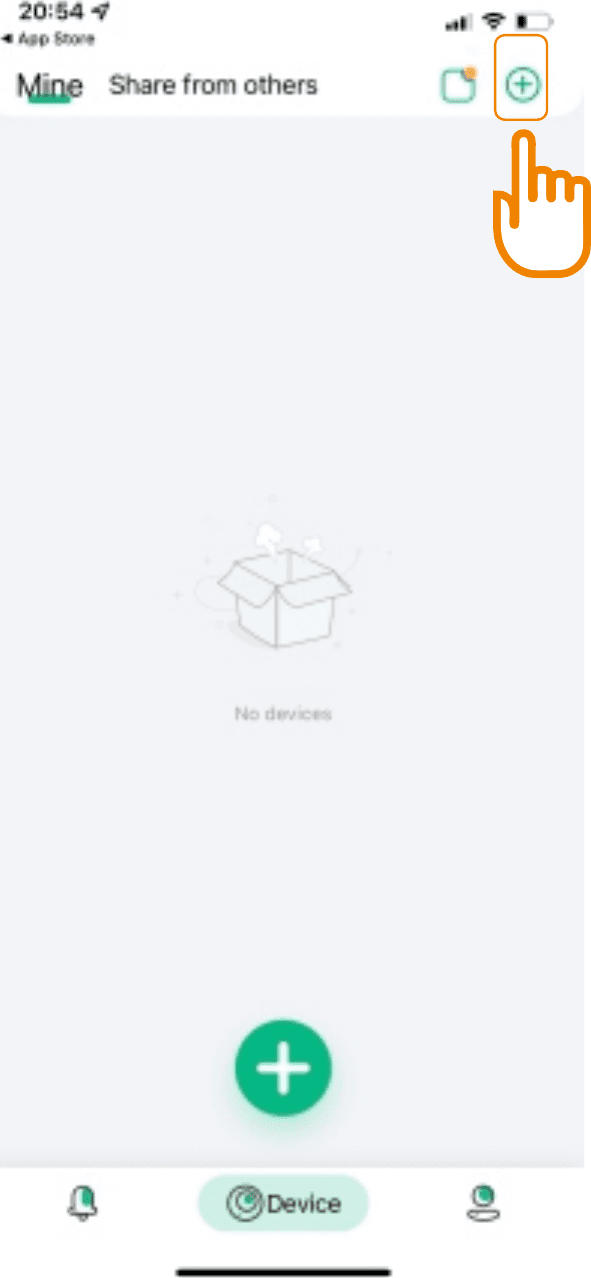
Run the app, click the upper right corner "+" to add.
Choose Network Type
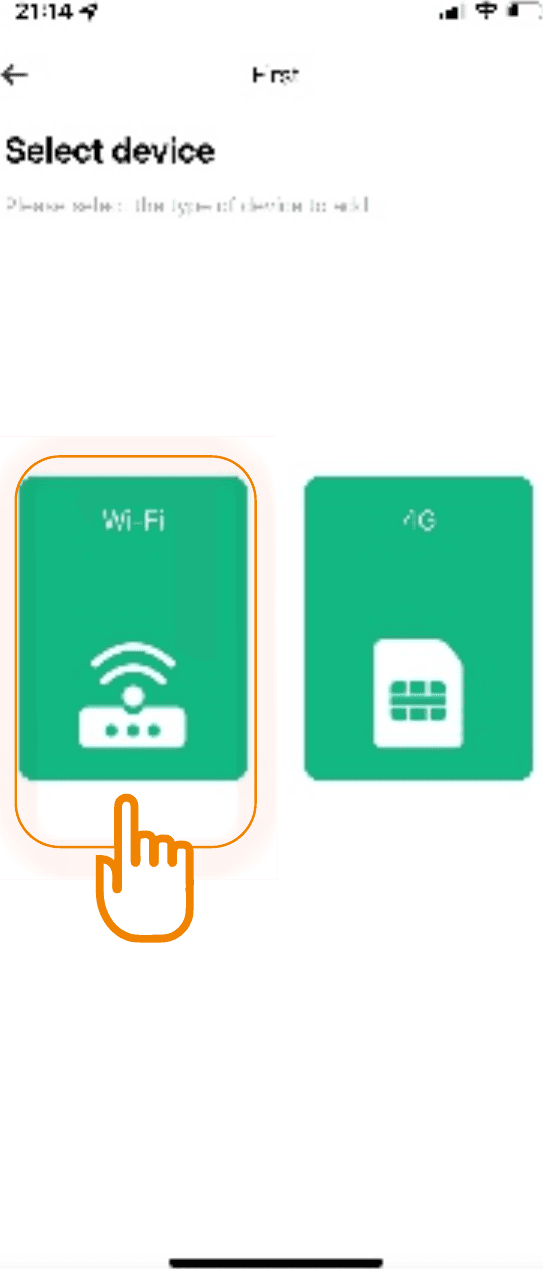
Select the WiFi option on the left.
Confirm Camera Status
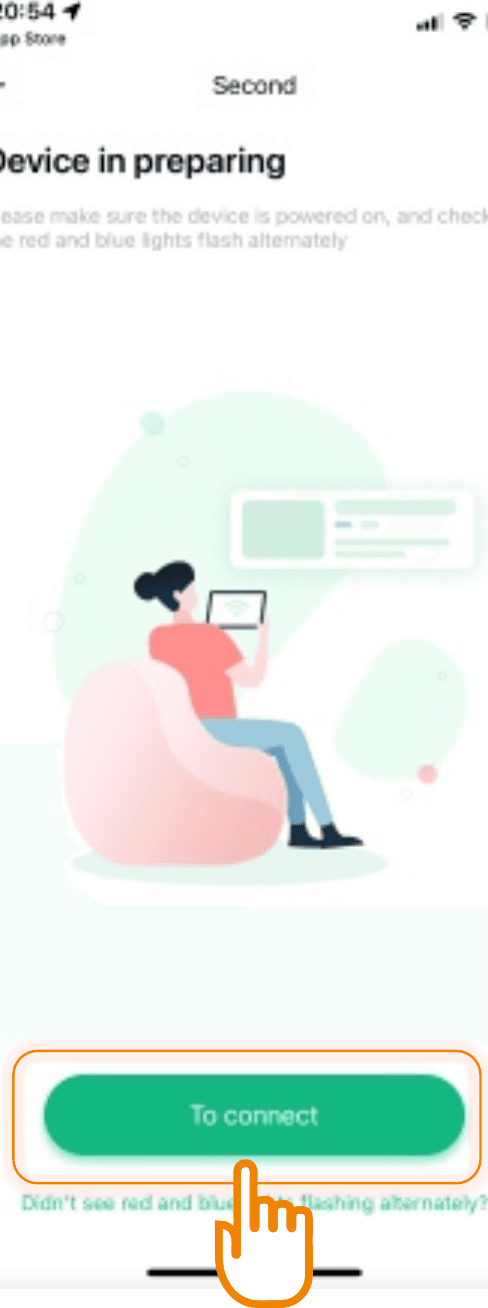
Follow the prompts to determine whether the indicator light on the front of the camera is flashing alternately in red and blue. If the indicator light flashes red and blue alternately, just click "To connect".
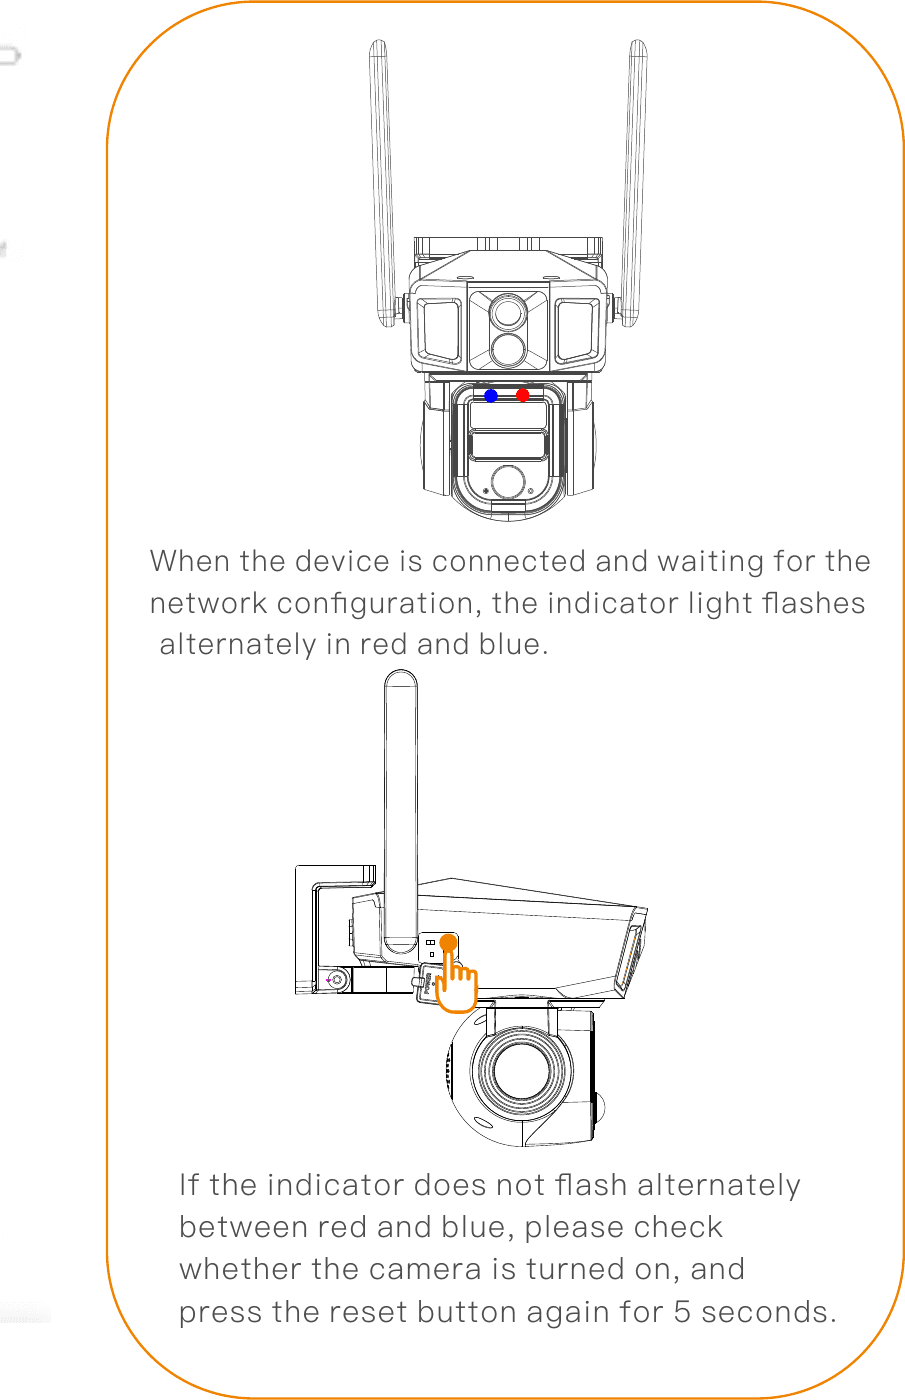
When the device is connected and waiting for the network configuration, the indicator light flashes alternately in red and blue.
If the indicator does not flash alternately between red and blue, please check whether the camera is turned on, and press the reset button again for 5 seconds.
Enter Network Information
Click Switch WiFi to select your home WiFi SSID, and enter the password below. (In order to avoid input errors, after the input is completed, you can click the eye pattern on the right to check whether the password is entered correctly.)
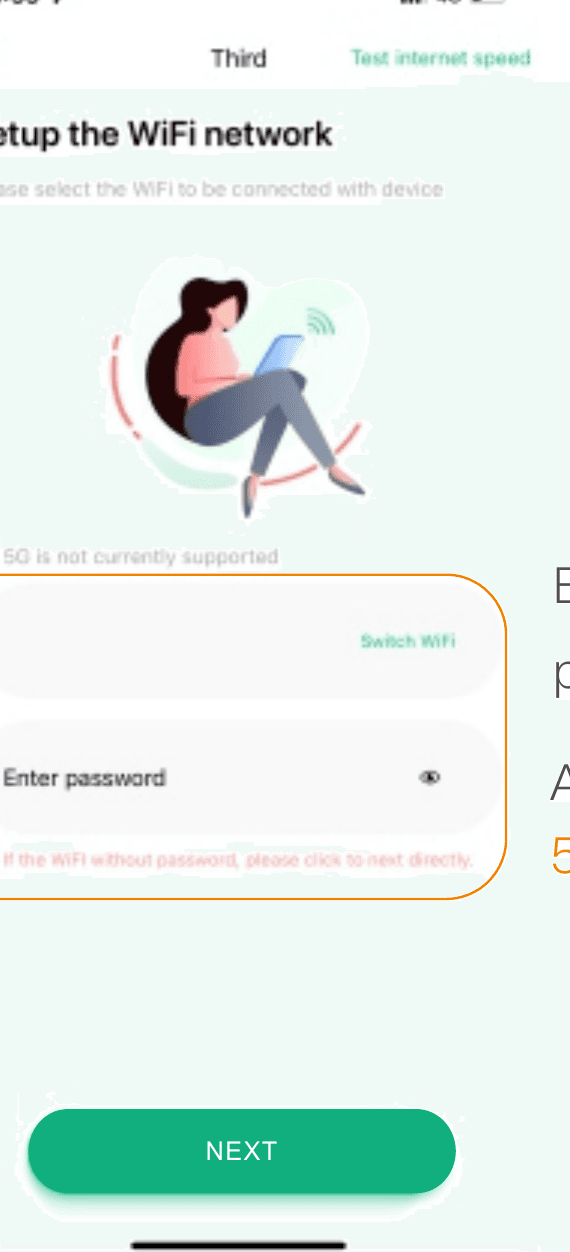
Attention: 5G is not currently supported.
Scan QR Code to Add Devices
Scan the QR code of the camera body, and click "connect" after hearing the mobile phone scan prompt voice. The APP and the camera will be automatically connected to network.
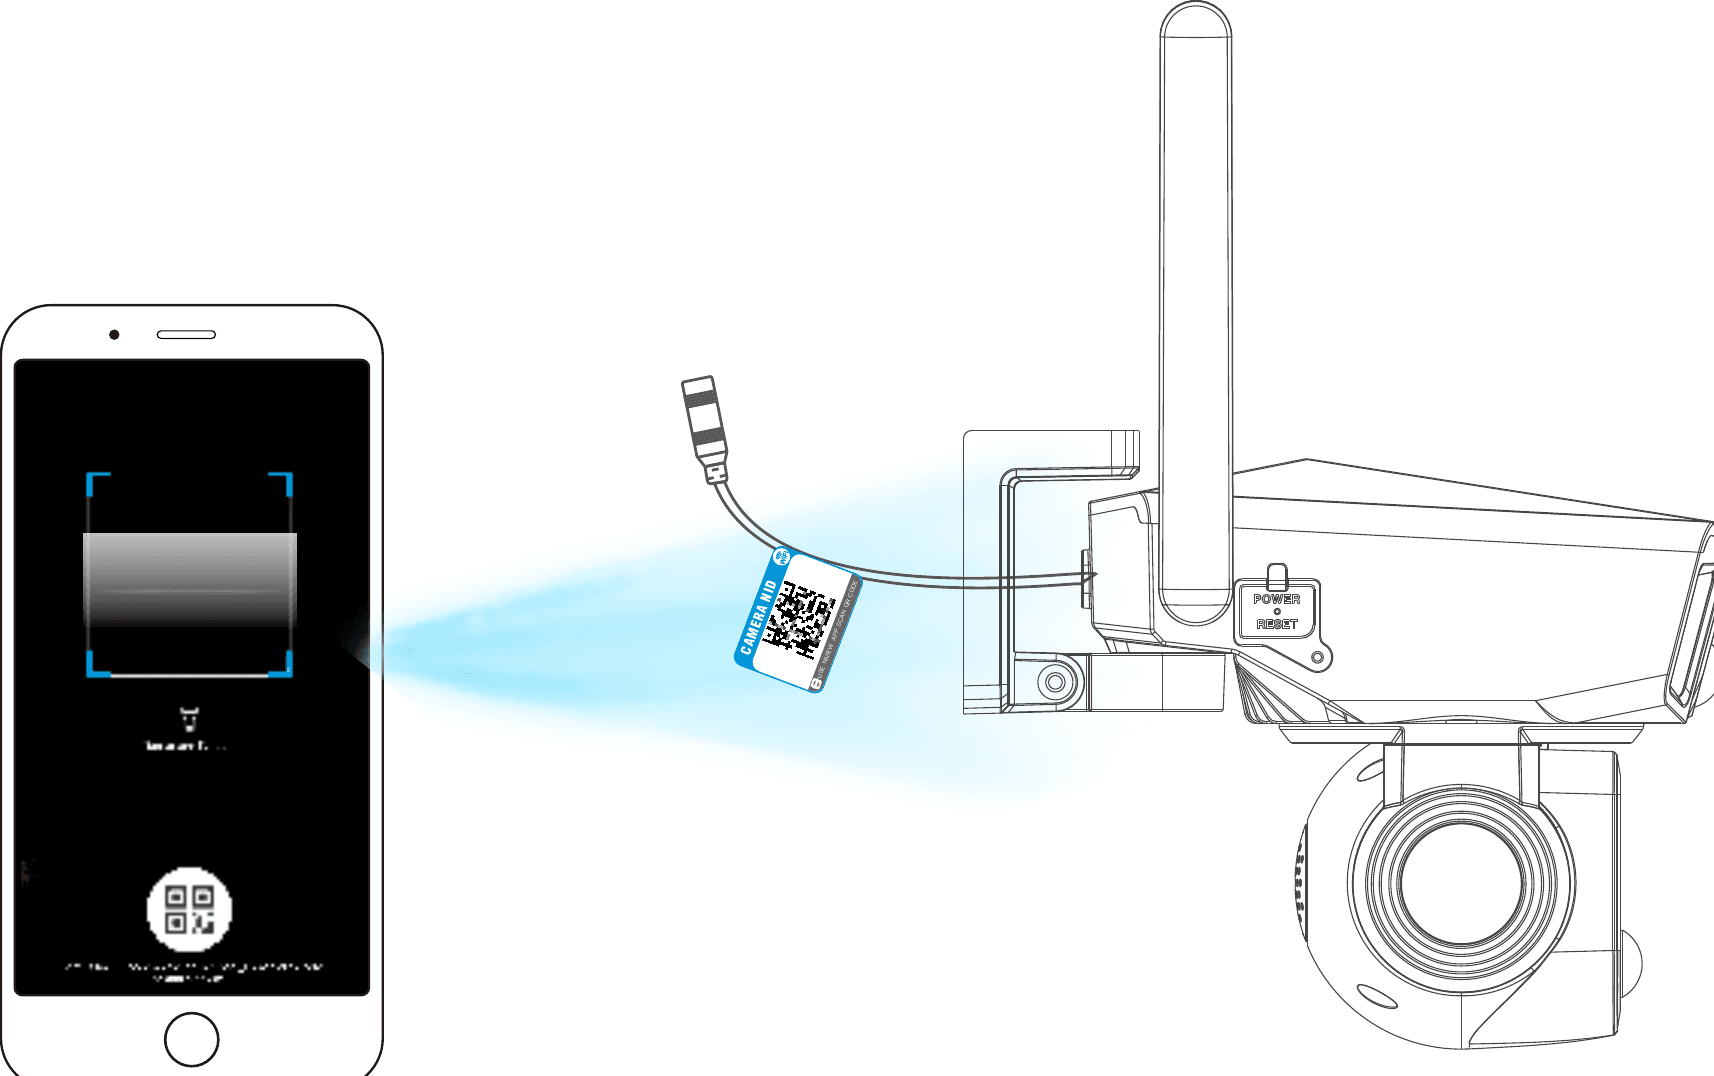
Notice: Versions below iOS11 require manual connection to the camera hotspot network. Please follow the APP prompts, go to the phone settings interface to connect to the hotspot starting with NIVIEW_XXXXX, then return to the APP interface to configure the network.
APP Homepage Instructions
Homepage Function
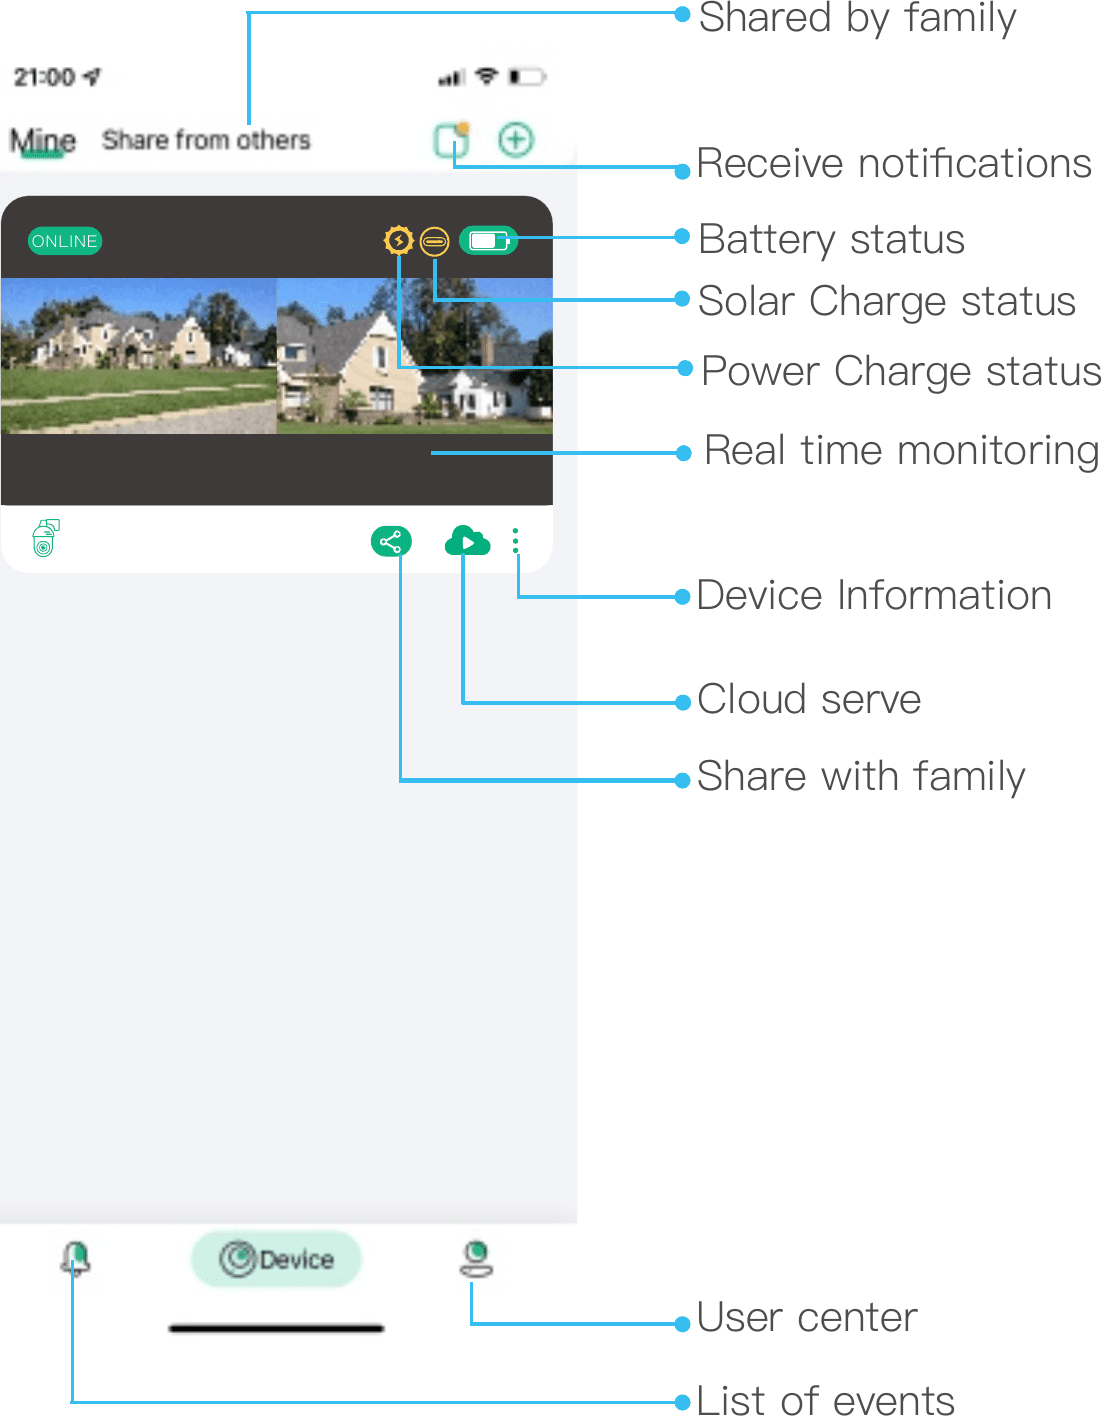
Introduction of camera's functions in the home page.
Sharing Function
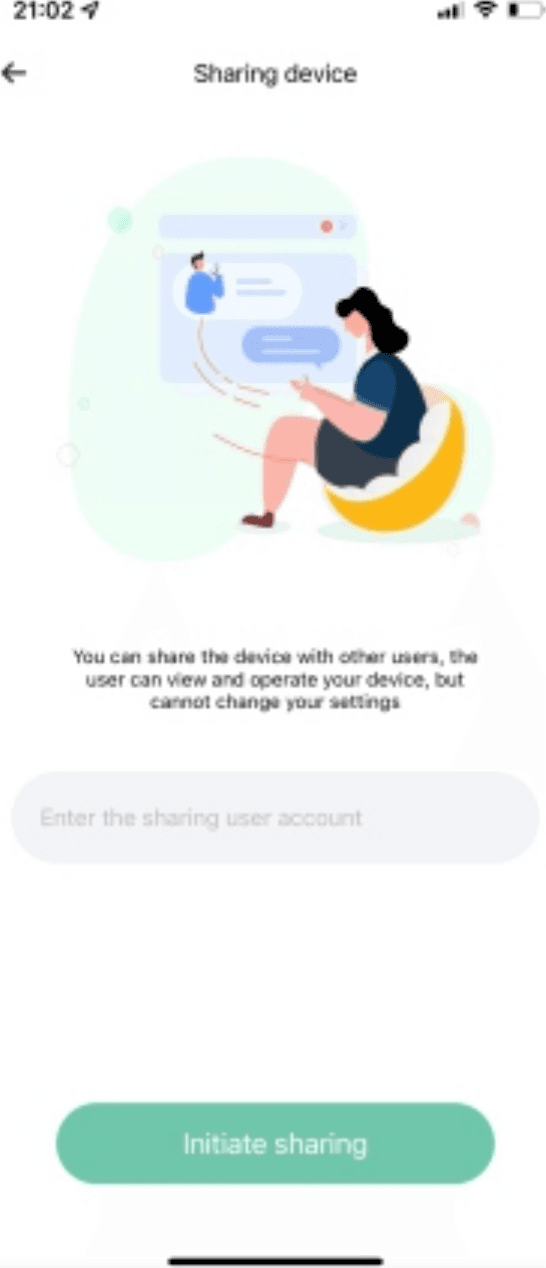
After your family has registered the account, click the share icon to share with them.
Do Not Disturb Mode
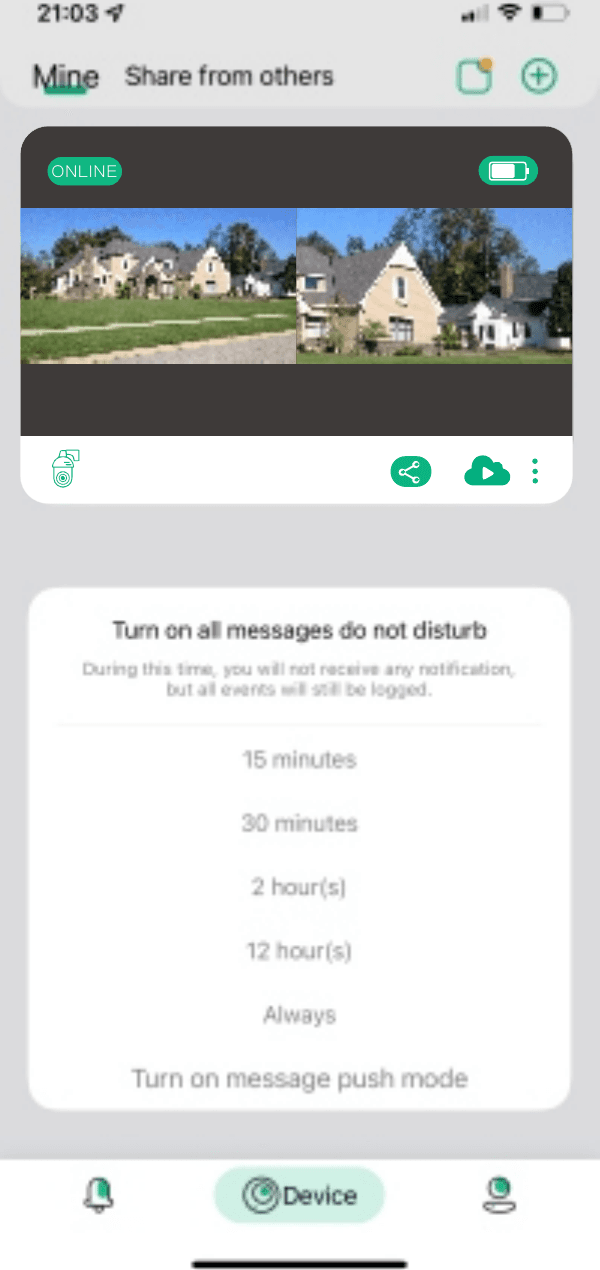
At the top of the page, enter the Do Not Disturb mode setting. When PIR is triggered, you will get the notifications in the real time. If you do not want to receive notifications, you can turn on Do Not Disturb mode.
Viewing the Event List
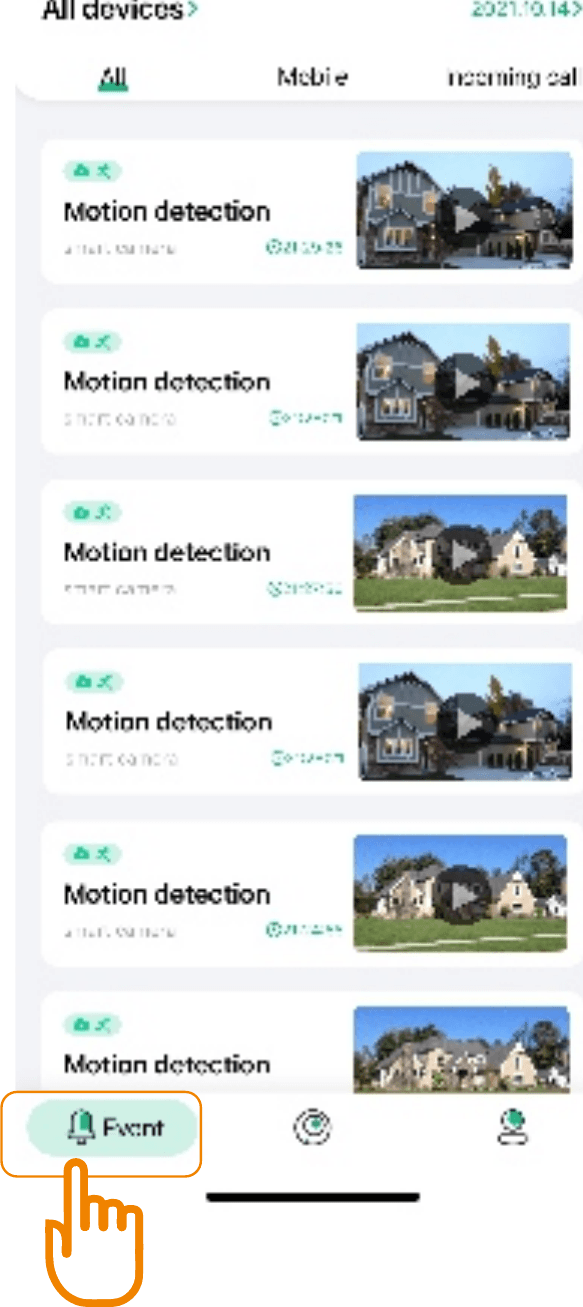
Click "Event" at the bottom of the page to enter the event list to view the alarm list of the device.
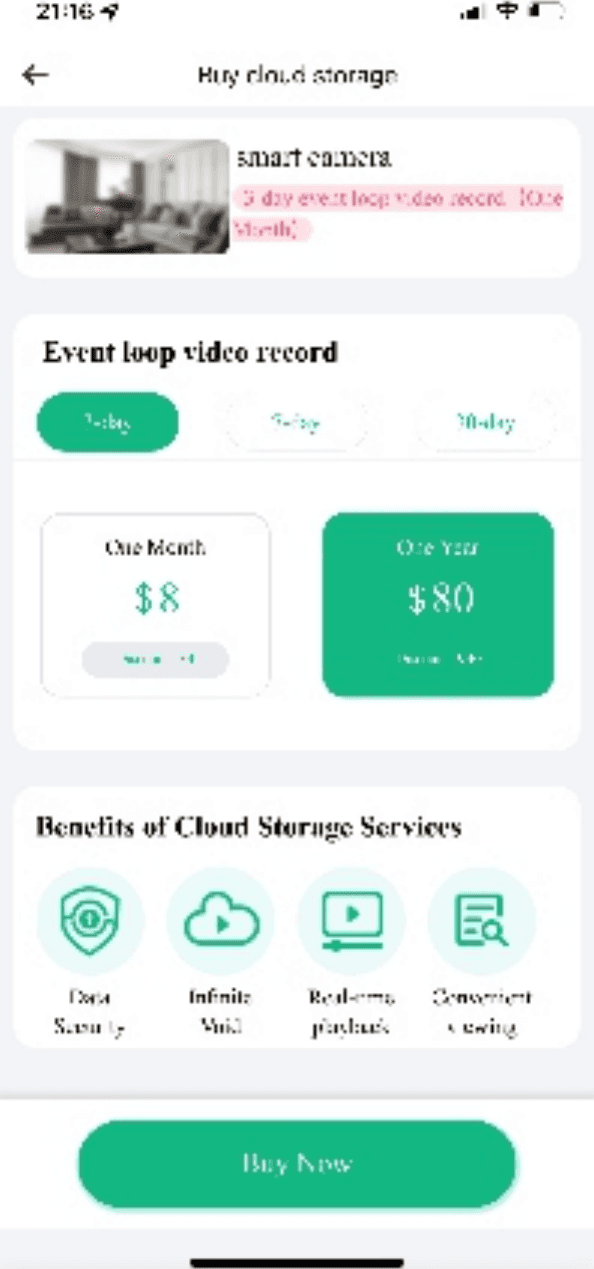
Cloud Storage Service
Click the cloud icon at the homepage to purchase the cloud storage packages.
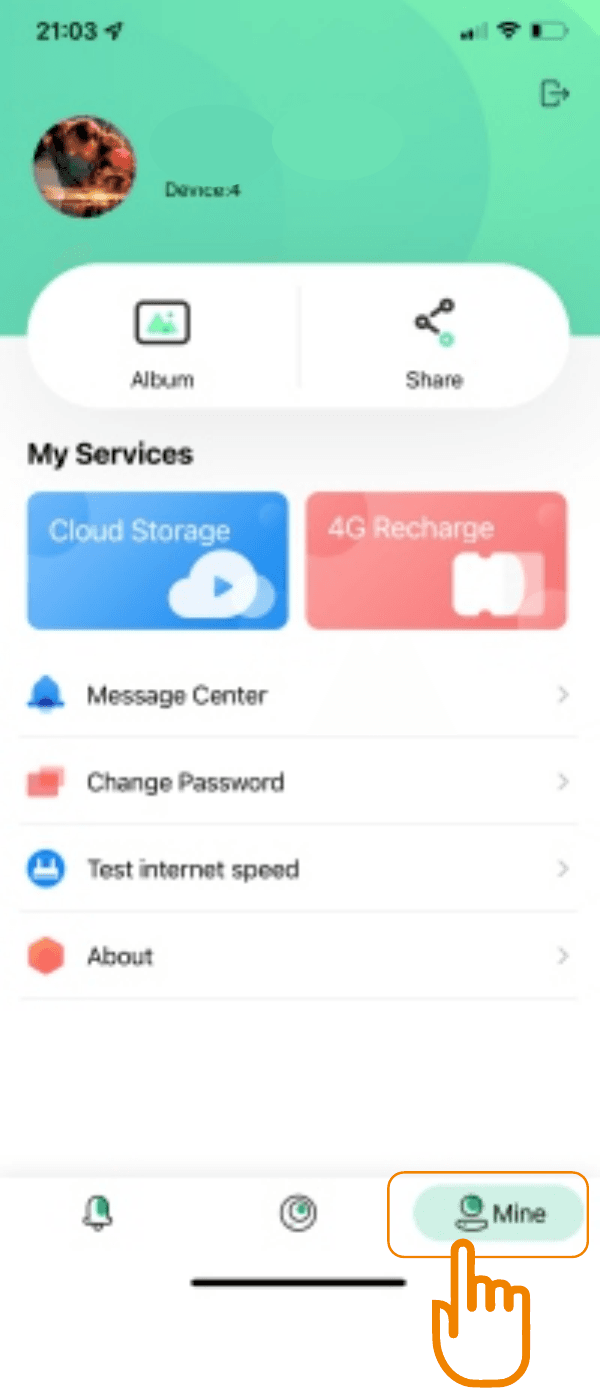
Manage Account Information
Click "Mine" at the bottom of the page to enter the APP page, you can modify the login password and manage all functions.
Real-time Monitoring and Playback
Real-time Monitoring
Click the screen on the homepage to access real-time monitoring.
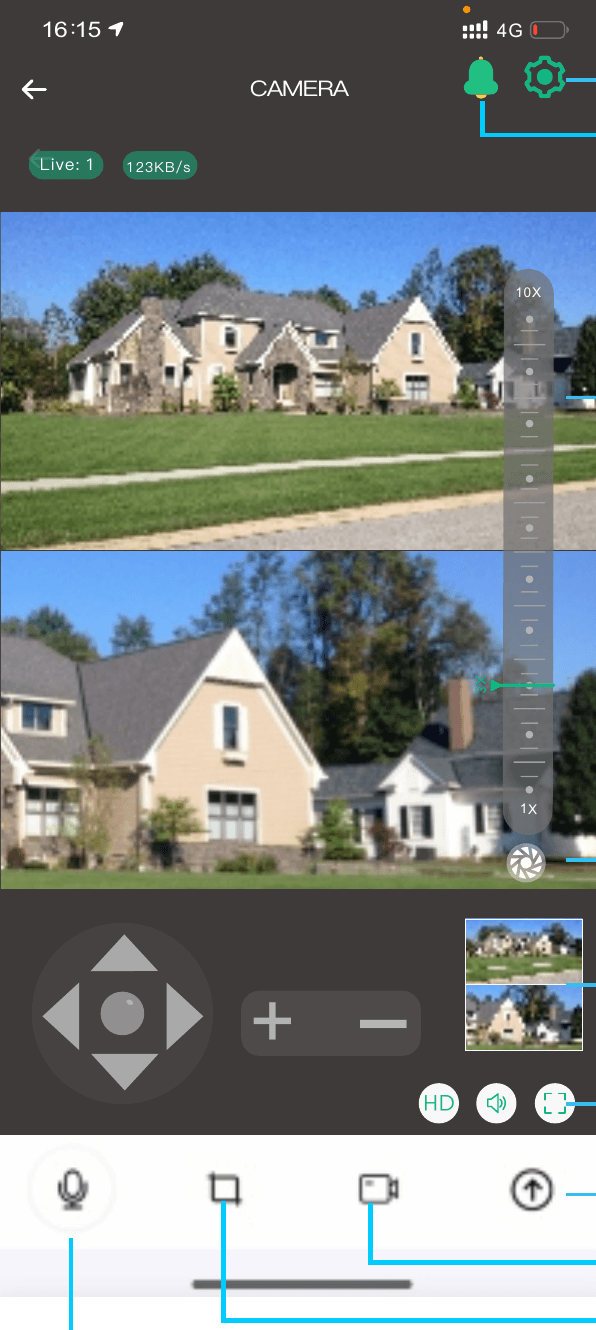
Screen controls and their functions:
- Setting — open camera settings.
- Alarm manually — trigger the alarm manually.
- Return — go back.
- Zoom Bar / Hidden Zoom Bar — show or hide the zoom slider.
- Screen preview — picture-in-picture preview.
- Full screen — switch to full-screen view.
- Pull up to control menu — swipe up to open the control menu.
- Screen recording, Screenshot, Intercom — record the screen, take a snapshot, or talk through the camera.
Finger Tracking Function: Click anywhere on the wide-angle screen above, and the close-focus monitor below will respond and display the detailed monitoring.
Video Playback of Memory Card
Click the video playback button on the homepage of the pull-up control menu to enter playback, then select memory card playback. Select the playback time, you can adjust the precision of the time axis. Use the playback date selection and the recording event list to find clips.
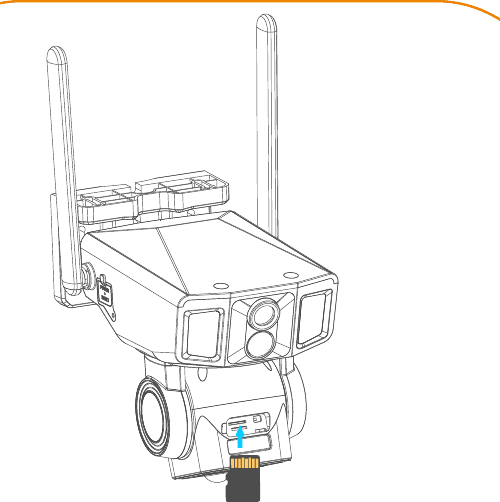
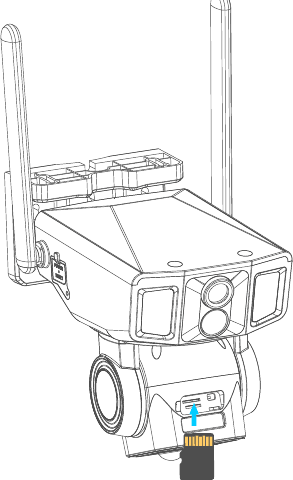
Note:
- The TF card is installed in the back cover.
- Insertion direction is contact points upward.
- If the card is inserted, but there is no videos, please enter the storage settings to format the memory card.
Video Playback of Cloud Storage
Click the video playback button on the homepage of the pull-up control menu to enter playback, then select cloud storage playback.
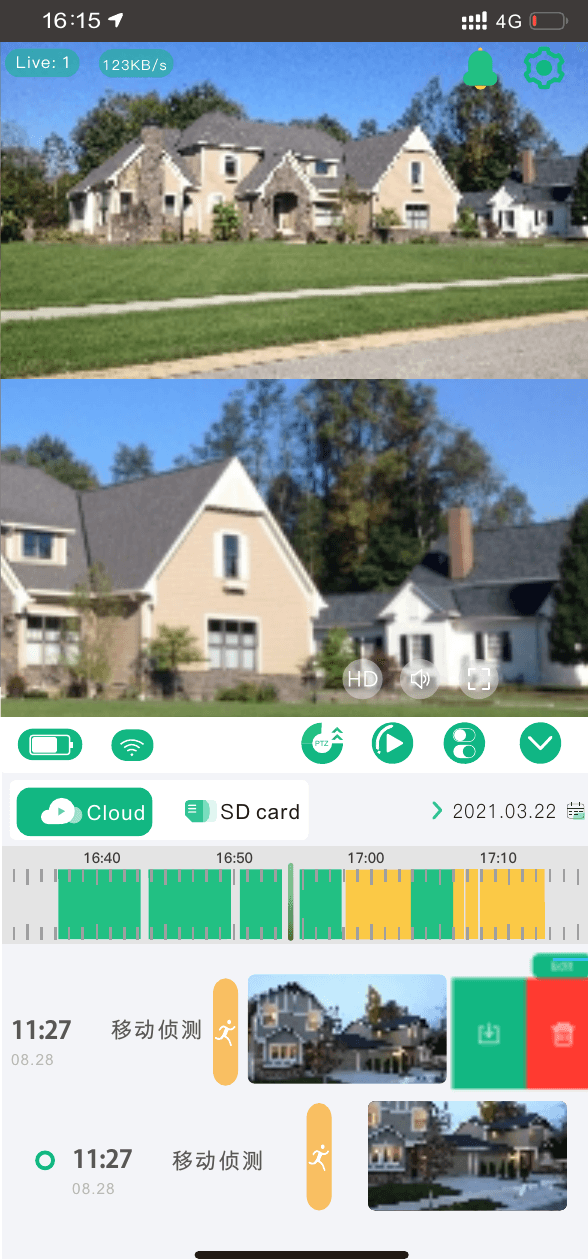
Click edit or swipe left to download or delete cloud storage data.
Control Instructions
PTZ Control
Click the pull-up menu to enter the control page, then click the PTZ button to control the PTZ camera.
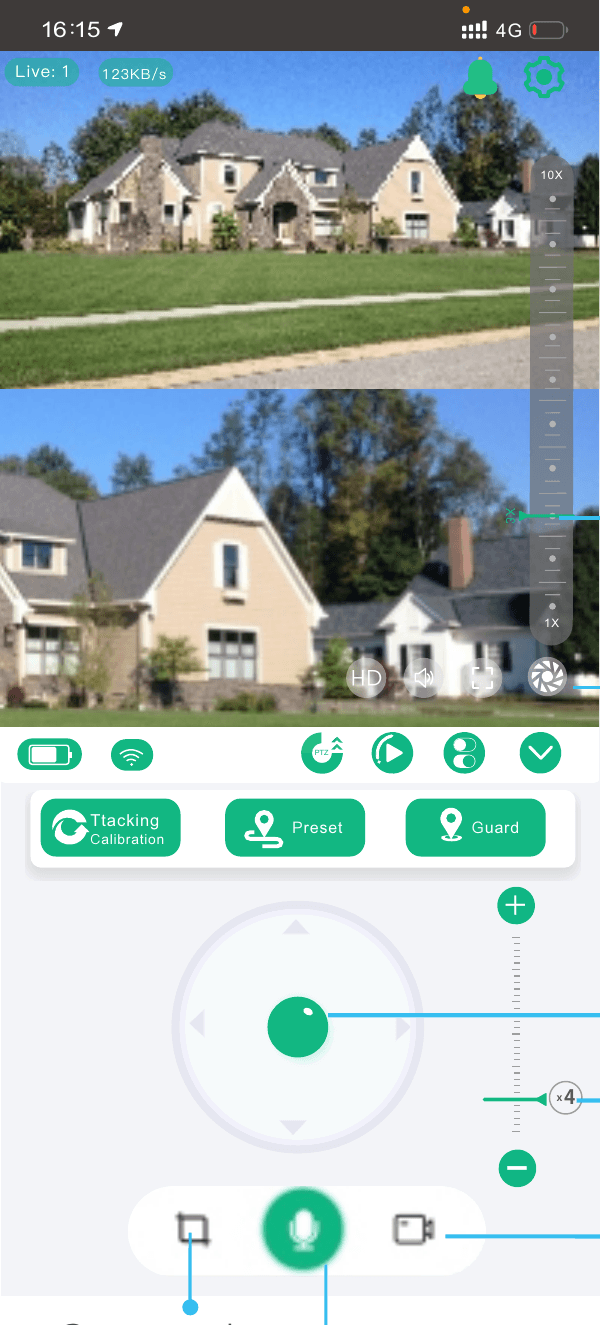
On the control page you can use the Pan/Tilt rotation control, Optical zoom, Zoom Bar / Hidden Zoom Bar, Screen shot, Screen recording and Real-time intercom. Three buttons provide the main PTZ functions:
Tracking Calibration: When there is a difference in the rotation direction of the camera's pan/tilt, you can click the reset, and the camera's pan/tilt will self-detect and calibrate the position of the pan/tilt.
Preset: When the user has multiple fixed-point to monitoring, can control the PTZ to the position that requires fixed-point monitoring and save the reserved position for quick positioning.
Guard: When human tracking is turned on, the camera will follow the human figure to rotate. Set the guard position to ensure that your key position can be monitored at any time. The setting method is to control the PTZ to your key monitoring point and click the guard position.
Intelligent Tracking and Linkage
In the detection settings, choose to Turn on or Turn off humanoid tracking.
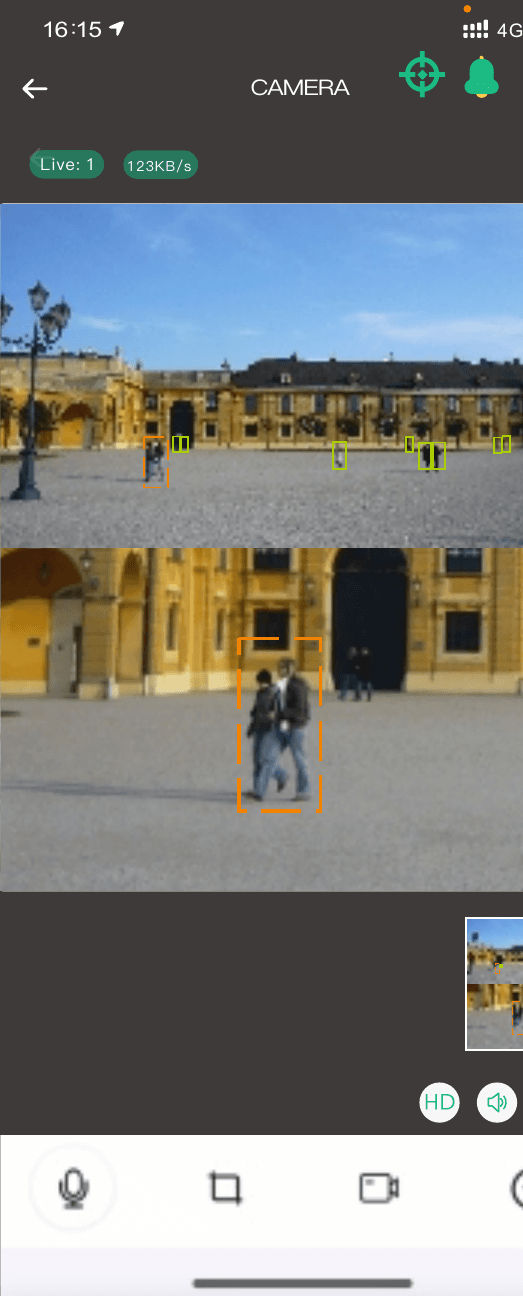
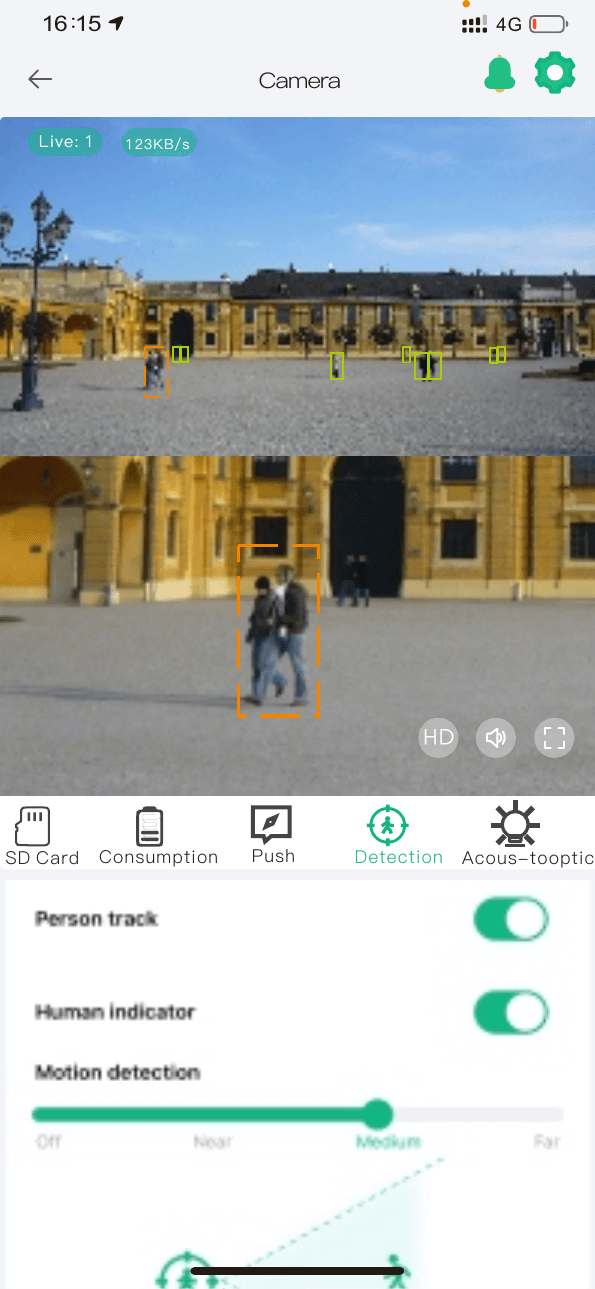
Finger Tracking Function: Clicking anywhere on the upper wide-angle screen, the PTZ monitoring below will be positioned there automatically.
Humanoid tracking function: Turning on the Humanoid tracking function, the human shape will be judged by the upper wide-angle camera, and the PTZ camera will be linked for pan-tilt tracking. When double-clicking any position on the wide-angle screen, the lower focus monitor will be positioned.
Humanoid Mark: When a person is detected within the monitoring range, a point frame will be displayed around the person.
System Settings
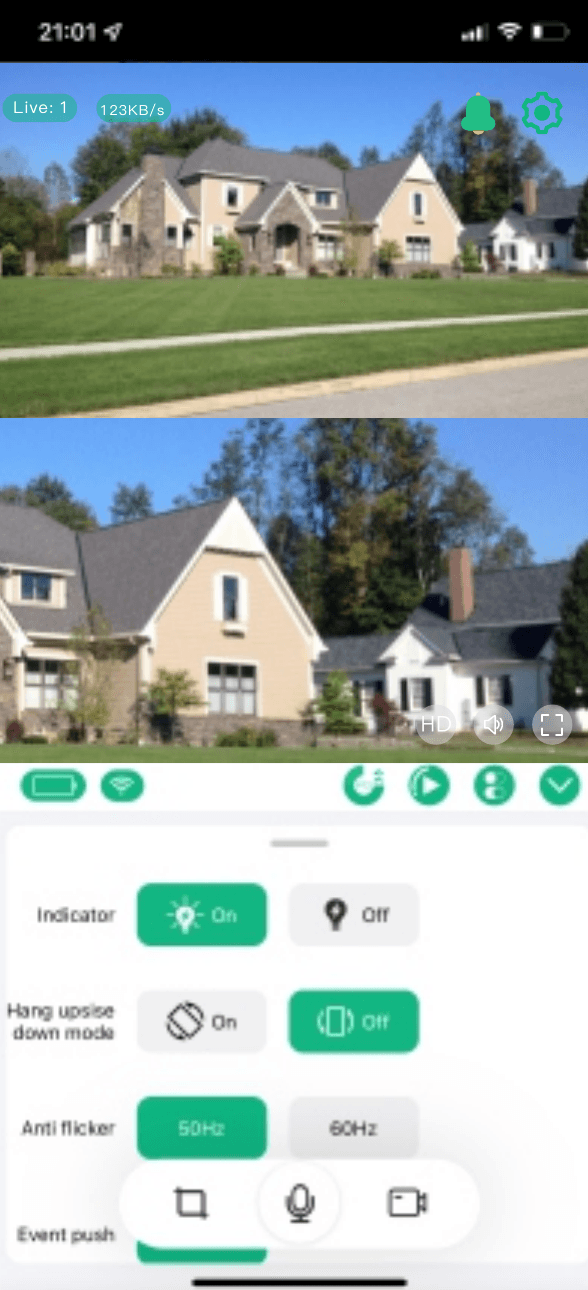
Quick Settings
Click to enter the camera quick settings.
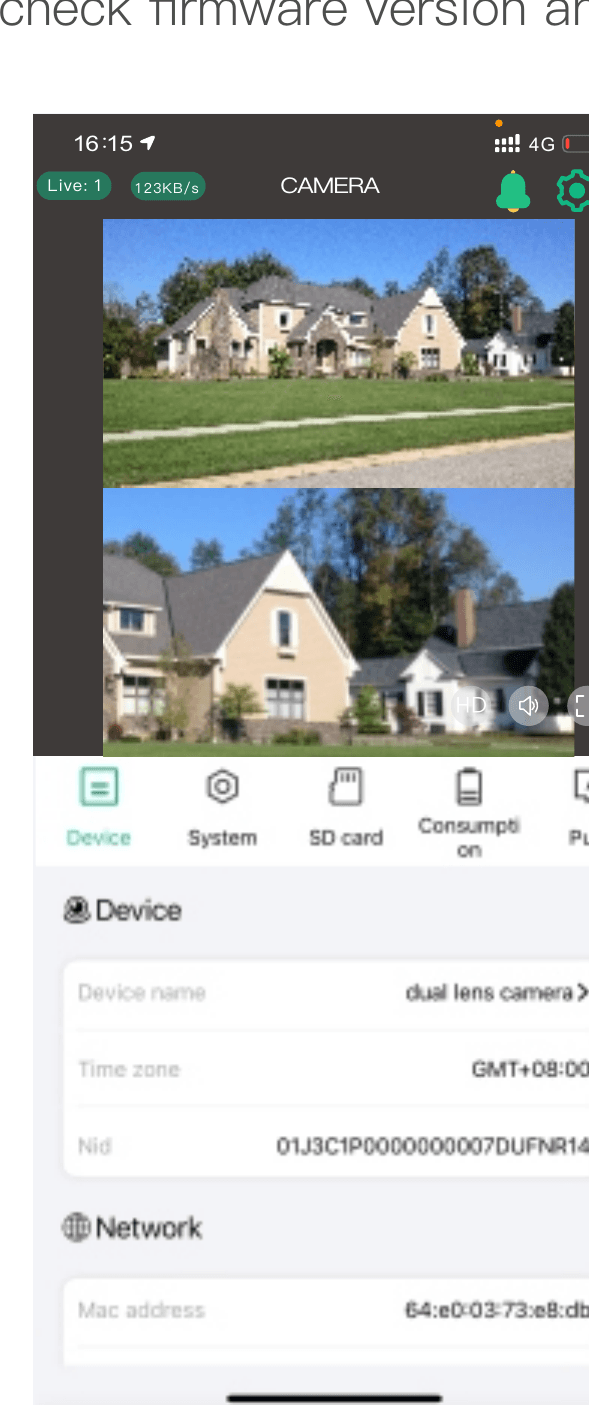
Device Information
Click to enter device information, check firmware version and upgrade.
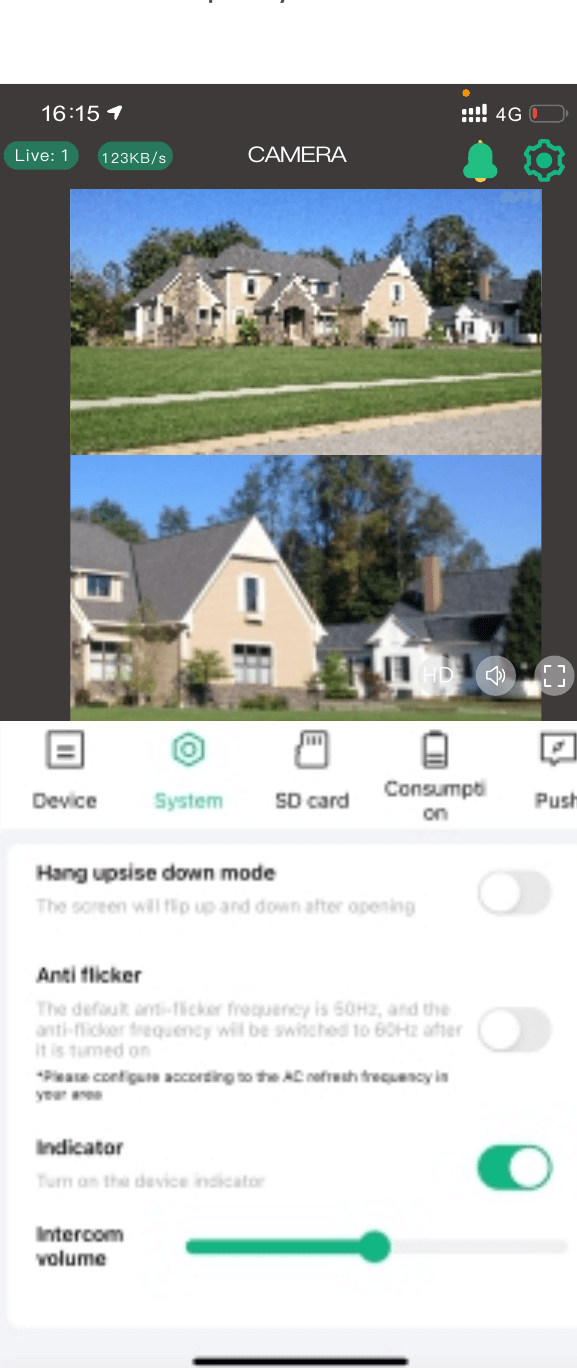
System Settings
Click to enter system settings, change the camera's display mode and other system settings.
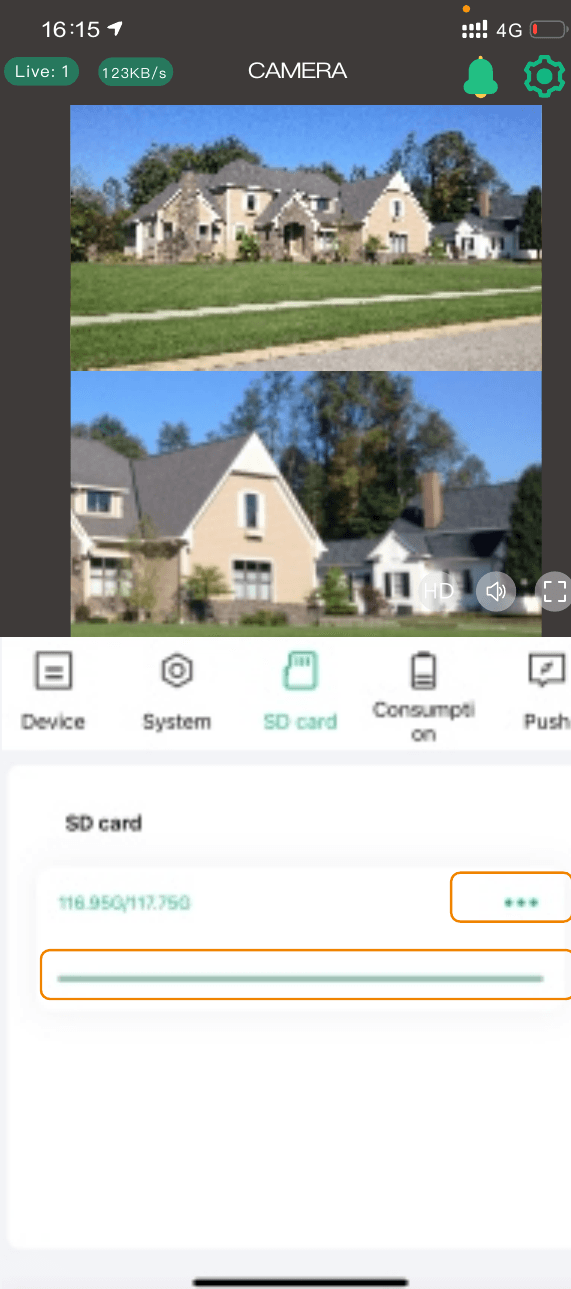
Memory Card Settings
Click to enter memory card settings, you can check its usage status and format.
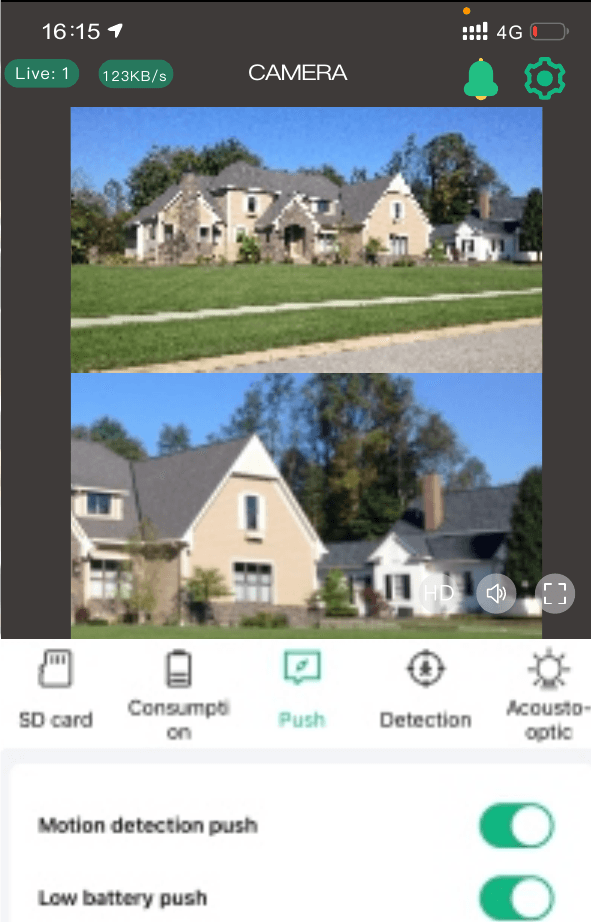
Alert Push Settings
Click to enter the push settings of the camera, select the information to be accepted according to your needs.
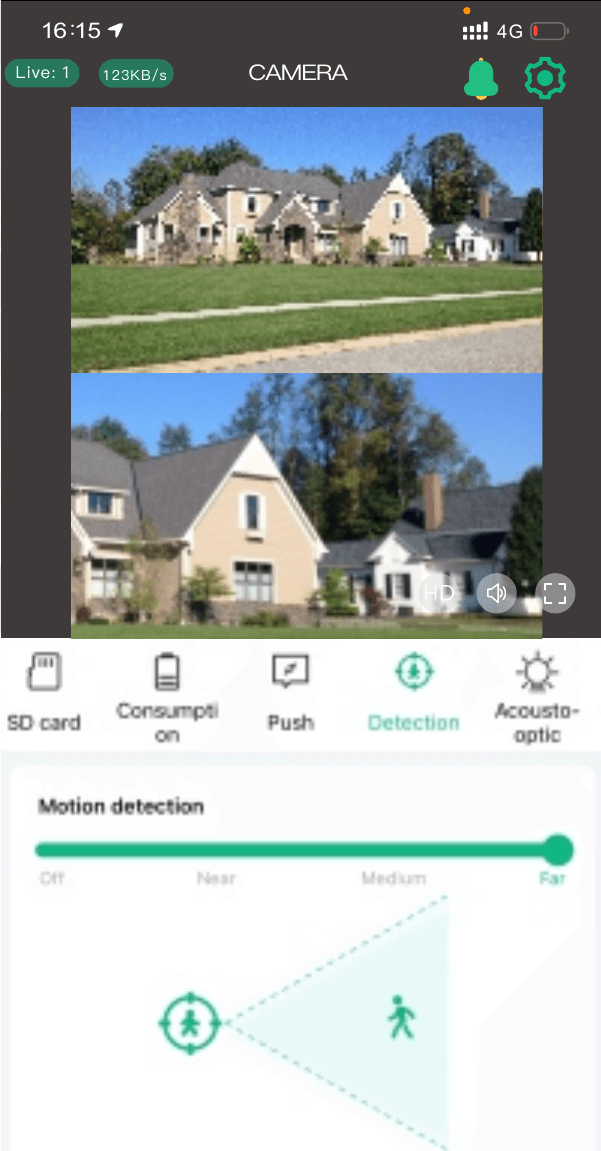
Detection Settings
Click to enter camera motion detection settings, you can set the sensitivity and detection distance adjustment.
Power Consumption
Click to enter power management, select the use mode according to the environment and user needs, which can better manage the use of the battery.
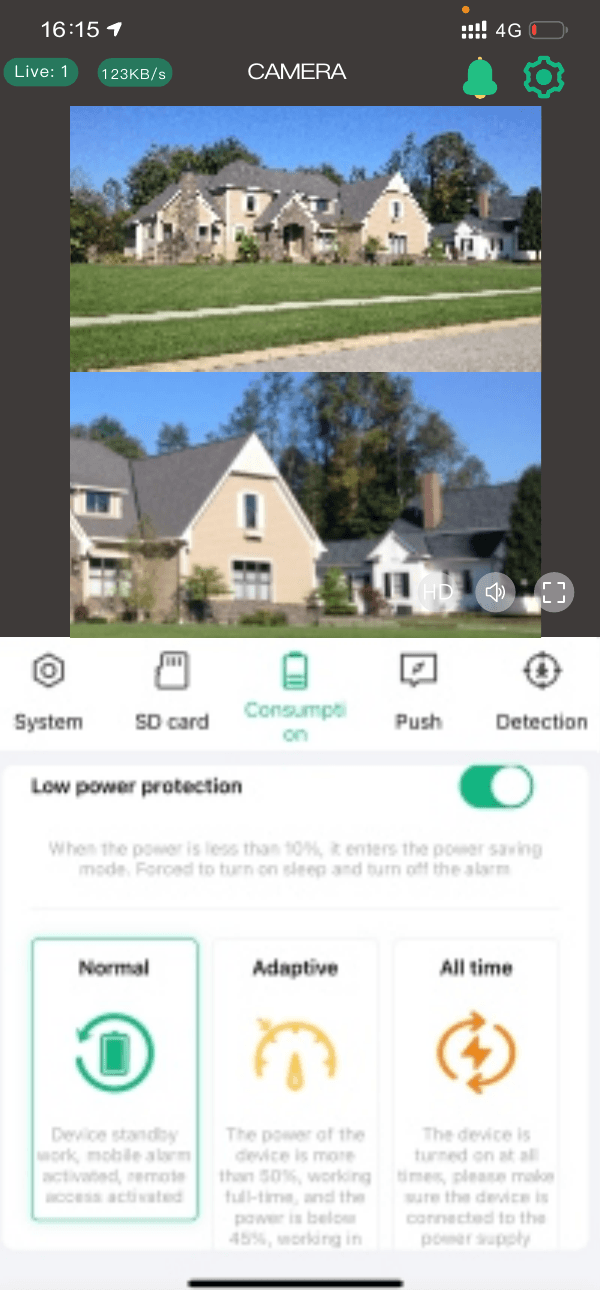
Low power protection: It is recommended to turn on this function. When the power of the camera is lower than 10%, the camera will automatically turn off PIR and other power-consuming functions.
Normal mode: It is the most energy-saving and efficient working mode. When the mobile phone is not remotely monitored, the camera is in standby mode. When a human body passes by, it will automatically activate the alarm and video record and push to the mobile APP at the same time.
Adaptive mode: When the power is more than 50%, it will start recording at full time. If lower than 40%, it will work on standby.
All time mode: The camera is working at all times, please make sure to connect the power supply to charge in this mode.
Sound & Light Settings
Click to enter camera sound and light settings, setting working mode of infrared led, white lights and alarm.
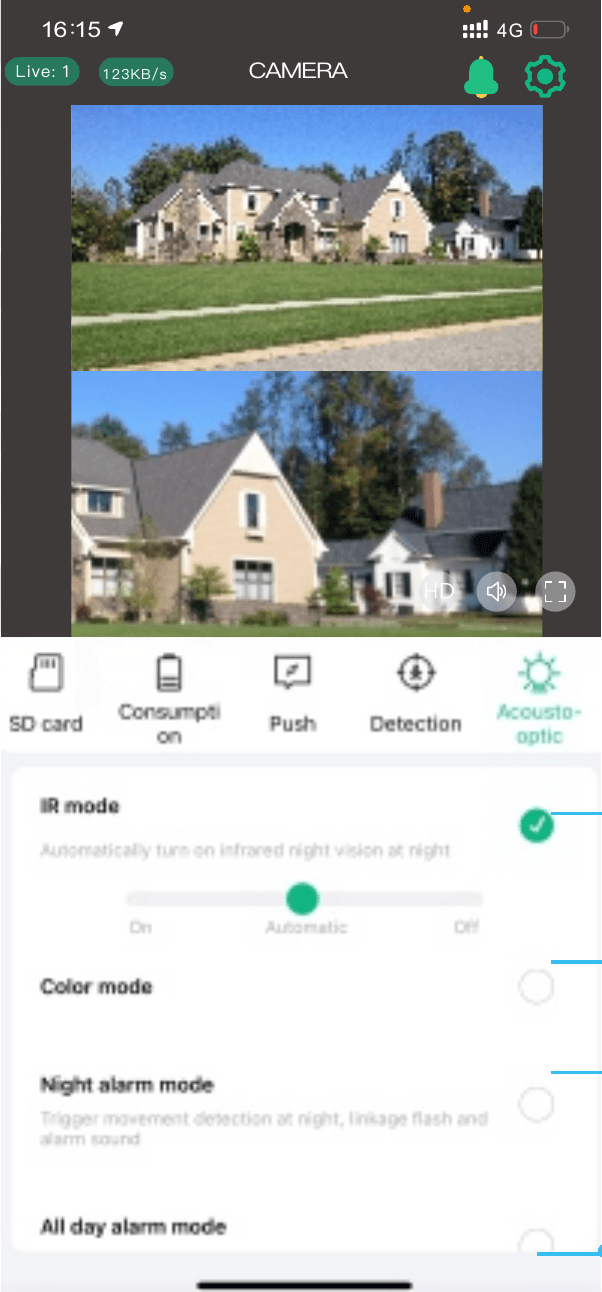
- Infrared leds control — automatically turn on infrared night vision at night.
- Color mode — white lights are on at night, camera video is full color.
- Night alarm mode — at night, when human passes by, the white lights flash and sound alarm.
- All day alarm mode — when human passes by, the white lights flash and sound alarm.
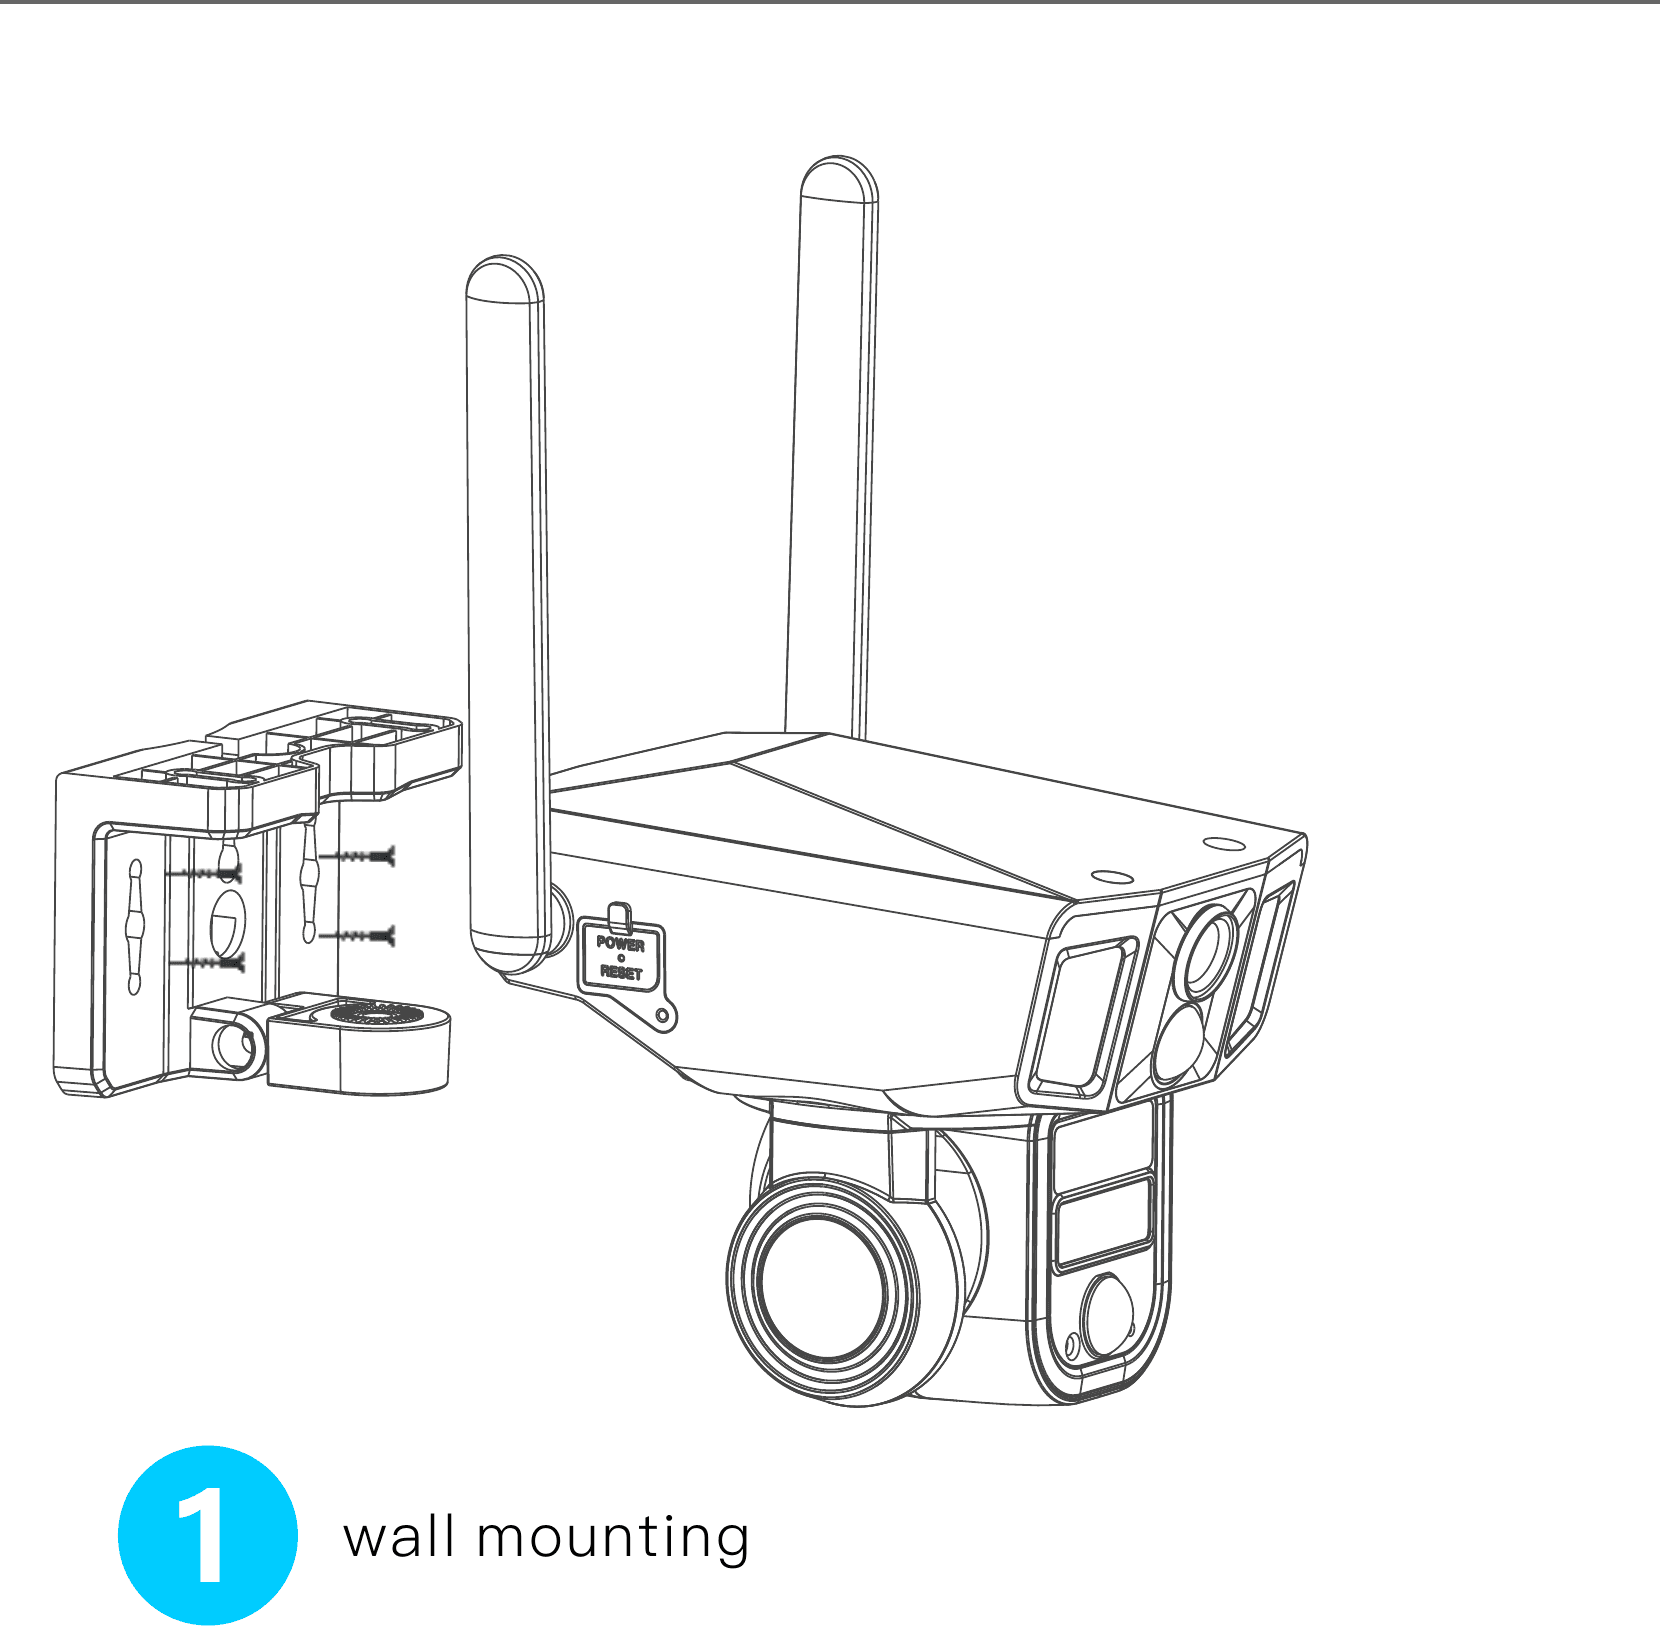
Wall Mounted Installation
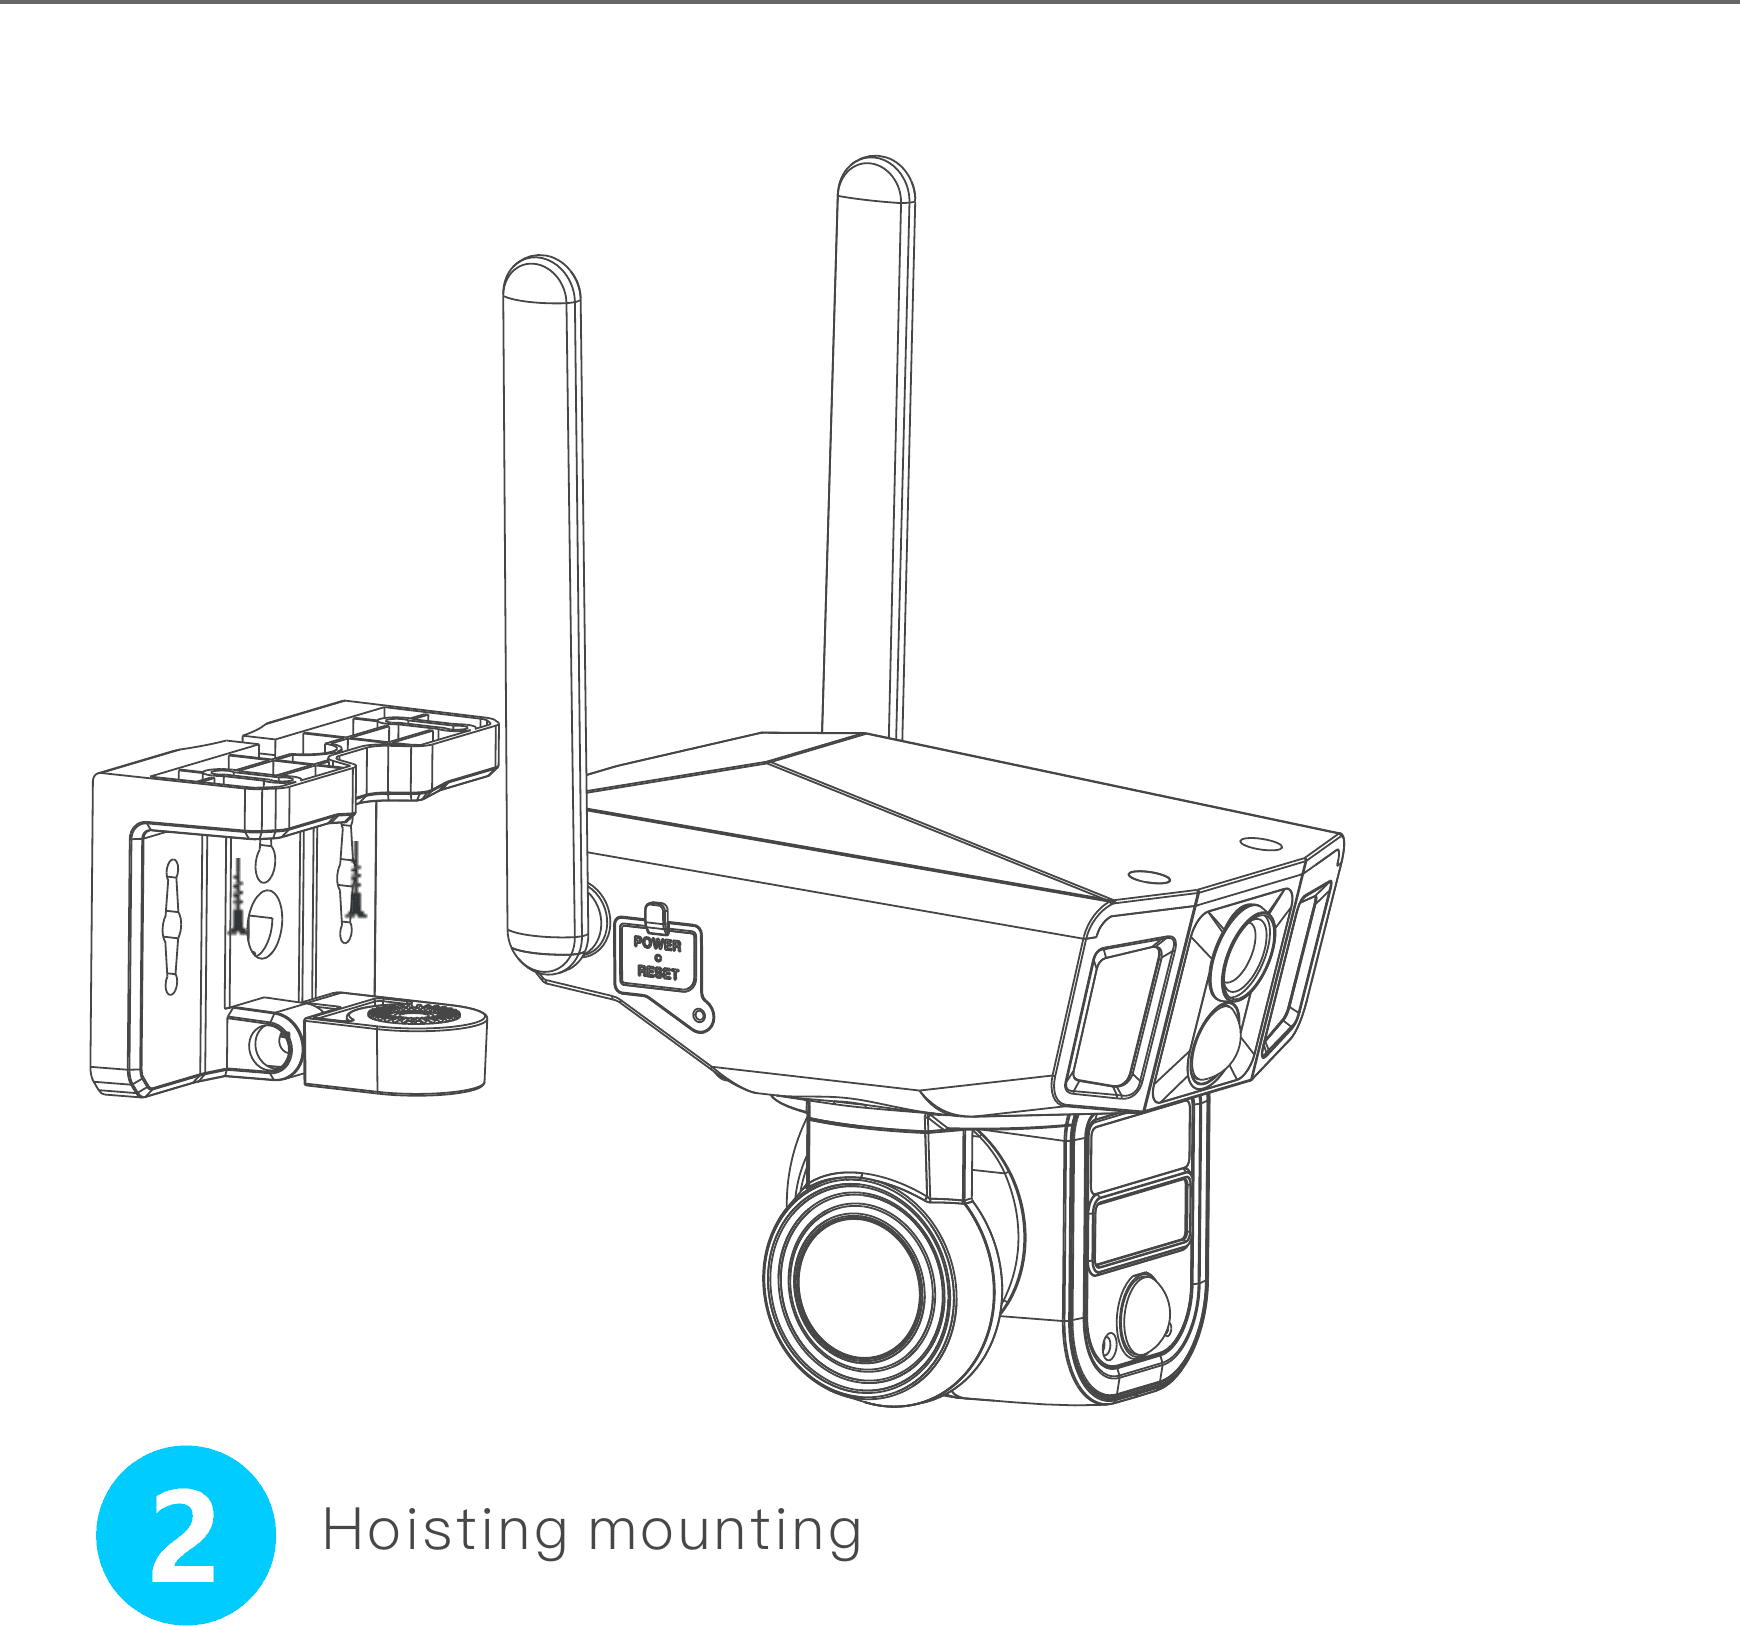
Ceiling Mounted Installation
The camera supports two ceiling installation options: wall mounting and Hoisting mounting.
Commissioning Instructions
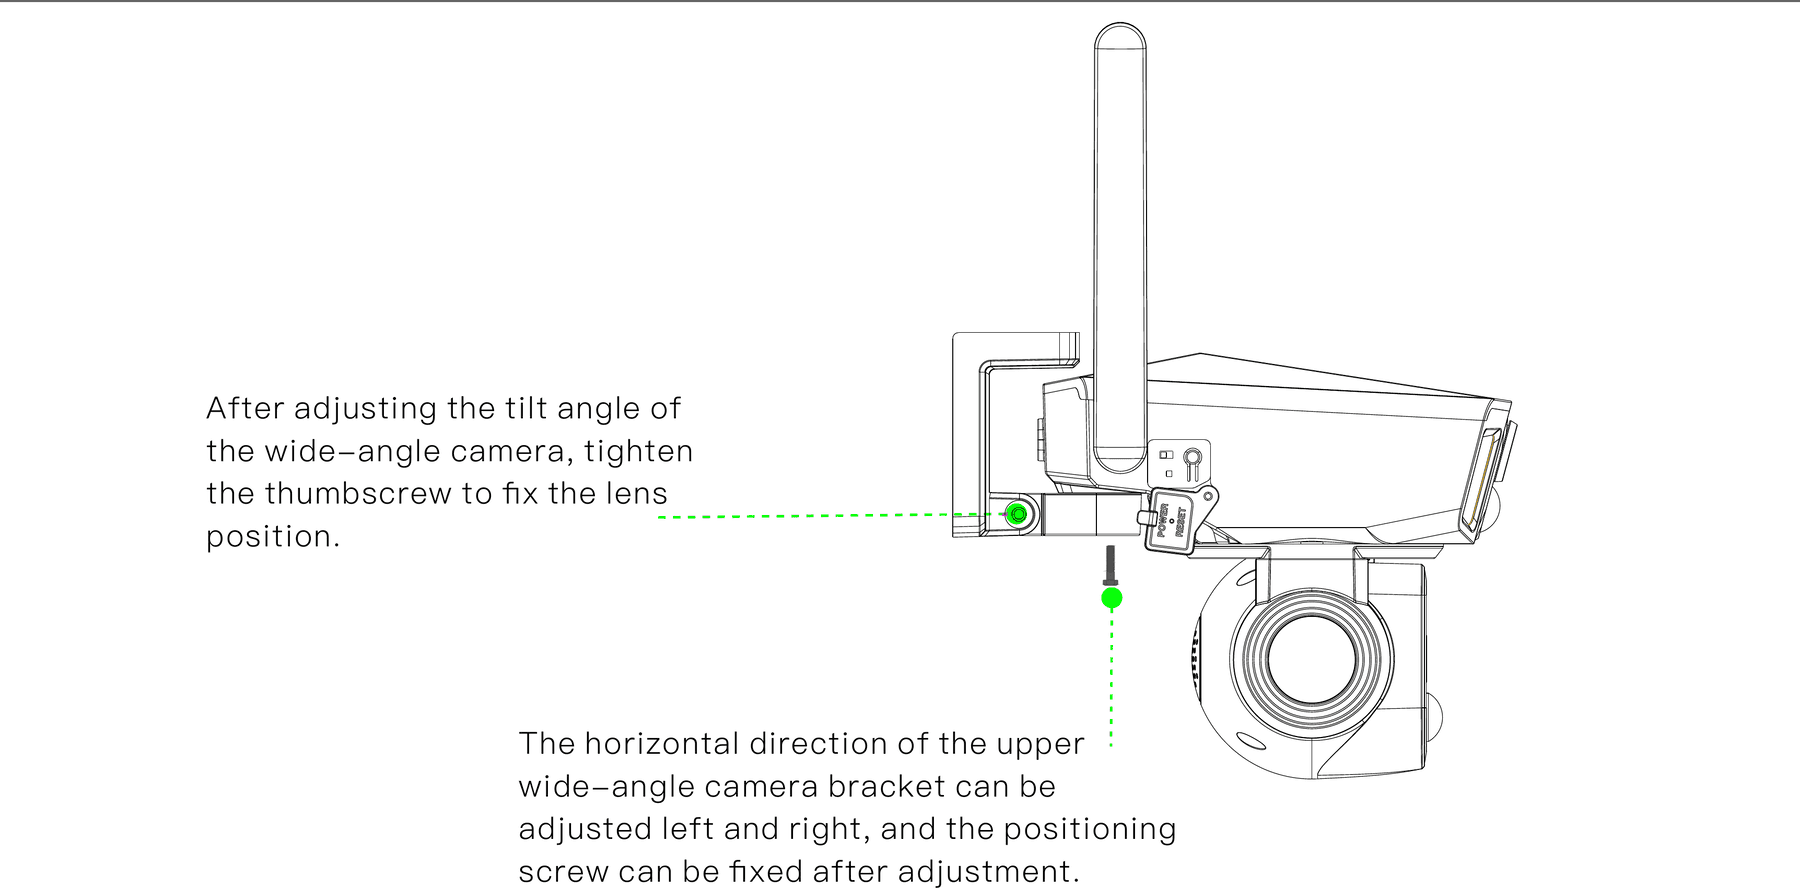
After adjusting the tilt angle of the wide-angle camera, tighten the thumbscrew to fix the lens position.
The horizontal direction of the upper wide-angle camera bracket can be adjusted left and right, and the positioning screw can be fixed after adjustment.
Technical Analysis
About Batteries & Solar Power
This camera adopts advanced low-power technology. If no motion is detected, the camera will enter sleep mode. After being fully charged, if the camera contains a 20000mAh battery, it can be awakened 6000 times by detecting human movement. If it works for 15 seconds at a time and is charged by solar energy, when the sun is full, the replenished power can be used for 300 wake-ups per hour.
Tips: If the camera is woken up frequently or detects the movements of human body for many times, the power of the camera will be consumed quickly. Charging the camera regularly is recommended. The battery in the camera can be charged for 500 times. If we charge the camera once a week, the life span of the battery can extend more than 9 years.
The recommended operating temperature of the camera is 14℉~122℉ (-10℃~50℃). Battery performance may drop at low temperatures. At -4℉ (-20℃), the battery may drain in short time, or even may not charge. It will work normally as the temperature rises.
FCC Compliance
Note: This equipment has been tested and found to comply with the limits for a Class B digital device, pursuant to part 15 of the FCC Rules.
These limits are designed to provide reasonable protection against harmful interference in a residential installation. This equipment generates, uses and can radiate radiofrequency energy and, if not installed and used in accordance with the instructions, may cause harmful interference to radio communications. However, there is no guarantee that interference will not occur in a particular installation. If this equipment does cause harmful interference to radio or television reception, which can be determined by turning the equipment off and on, the user is encouraged to try to correct the interference by one or more of the following measures:
- Reorient or relocate the receiving antenna.
- Increase the separation between the equipment and receiver.
- Connect the equipment into an outlet on a circuit different from that to which the receiver is connected.
- Consult the dealer or an experienced radio/TV technician for help.
Changes or modifications not expressly approved by the party responsible for compliance could void the user's authority to operate the equipment.
This device complies with Part 15 of the FCC Rules. Operation is subject to the following two conditions: (1) this device may not cause harmful interference, and (2) this device must accept any interference received, including interference that may cause undesired operation.
RF Exposure Warning Statements
This equipment complies with FCC radiation exposure limits set forth for an uncontrolled environment. This equipment shall be installed and operated with minimum distance 20cm between the radiator & body.